
In March we learned how to stitch a sashiko clover, inspired by the Whitworth’s collections and family stories about Steph’s grandfathers. This time we learn how to stitch a new sashiko pattern for summer.
Didn’t catch the spring sashiko clover tutorial? Click here to find out how to stitch your own sashiko shamrock.
Welcome back to another instalment of my sashiko patchwork project, where we’ll be stitching a sashiko symbol for each season. If you’re joining me for the first time, you may want to have a look at my sashiko clover pattern. This time we’ll be stitching a slightly more difficult pattern.
What is Sashiko?
For the benefit of those of you who have never heard before, here’s a little bit of information about sashiko:
Sashiko is a form embroidery which originated in Japan. This kind of embroidery only uses running stitch. In the past, it was most often used to embroider traditional geometric designs onto clothing but today many different types of sashiko patterns are available. There’s no need to split the thread as you would embroidery floss when working on a sashiko project, as sashiko is traditionally done using a thick thread. If you’re interested in learning more about the history of sashiko, you can find out more in a post I wrote some years ago: Sashiko: Simple Japanese Stitching.
The Inspiration for the Summer Rose Sashiko Pattern
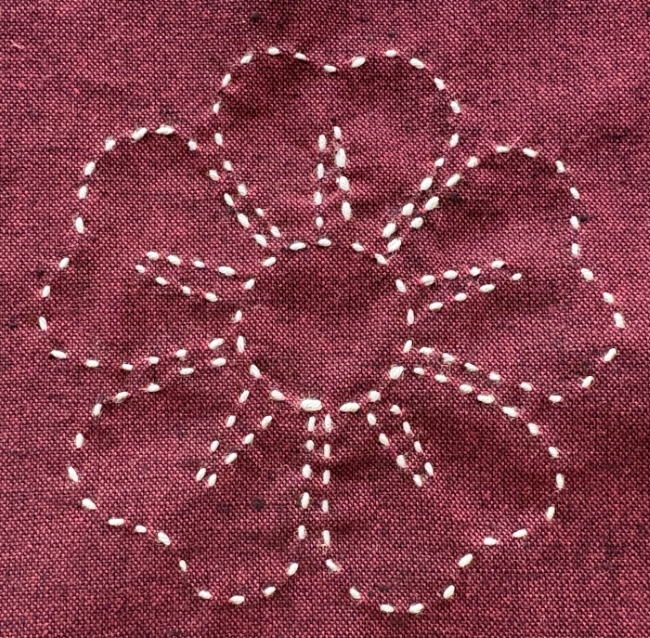
I have chosen the rose, a familiar sight as we move into warmer months, to represent summer. The rose has been adopted as the symbol of two English counties; Lancashire (a red rose) and Yorkshire (a white rose). When Henry VII married Elizabeth of York, the red rose he utilised as a symbol of the House of Lancaster and a white rose symbolising the House of York were combined to create the familiar Tudor rose.
Representations of the Tudor Rose may not have been uniform at first, but the messaging was obvious, and it made for a good piece of propaganda; here was an end to conflict between the houses of Lancaster and York and the beginning of a new dynasty. Today a red rose is used as a symbol of the county of Lancashire, and it is featured on Lancashire’s County flag. A white rose is used as a symbol of Yorkshire and a heraldic white rose is present on Yorkshire’s County flag. The red rose and the Tudor rose are also used as symbols of England more generally. Some English sports teams have adopted the red rose as an emblem. A Tudor rose can be found on some 20p coins and on the new £1 coins.
My maternal grandfather loved his roses, so much so that if he spotted a horse, he’d follow it with a shovel and a bag- all so he could collect the manure for his roses. He loved his roses almost as much as he loved his canaries. When I first glimpsed Walter Crane’s Design for the True Union on display in our Everyday Art School, the roses and shamrock immediately reminded me of my grandfathers. Each of them gravitated toward one of those plants and chose to place them in their gardens.
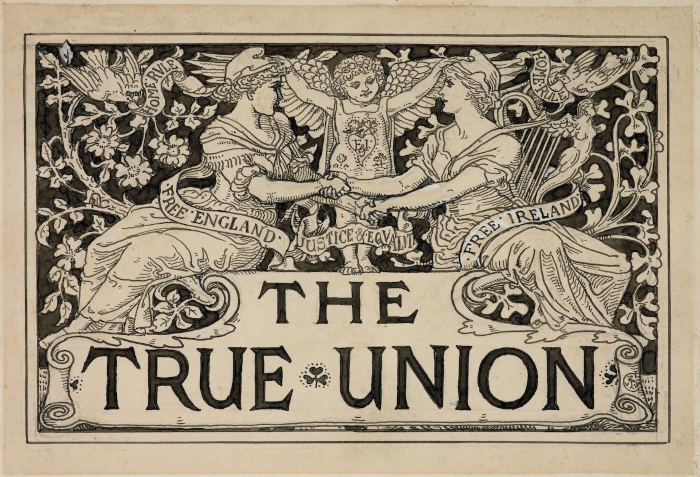
This sashiko pattern was also inspired by some of the elements of the designs for heraldic roses. I have tried to mimic the overall shape of the roses from Design for the True Union, whilst also taking inspiration from the pointed shape of some of the lines which can be found on the petals of more heraldic-looking designs for roses. See below for similar roses I found in the Whitworth’s collection.

The piece of wallpaper pictured above was originally designed for the House of Commons c.1848-50. The design features roses and fleur-de-lys. The wallpaper pictured below, also designed by Augustus Welby Northmore Pugin, dates to 1843.
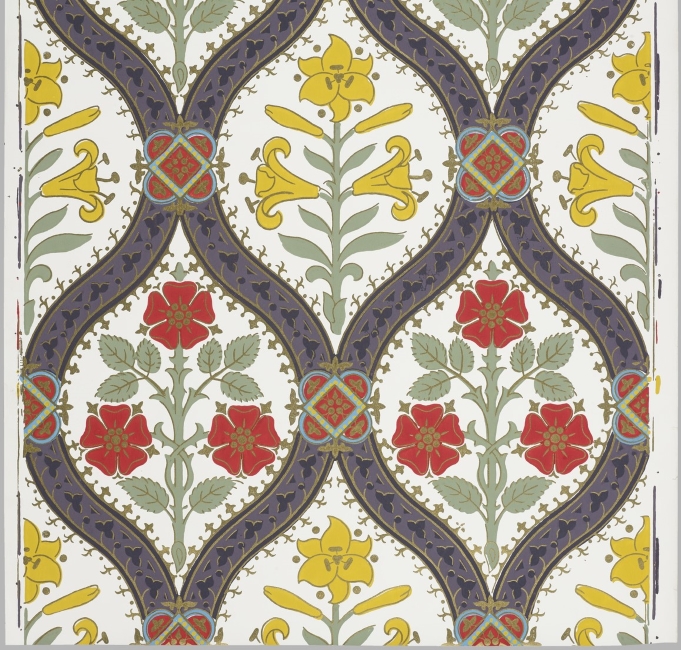
The design for this wallpaper features less stylised lilies, far from the heraldic fleur-de-lys. The roses are shown face-on, like heraldic roses, but are not topped with a crown as they are in the House of Commons design.
Stitching the Pattern
For this sashiko project, you will need:
- A sashiko needle.
- Sashiko thread. I used a grey thread of medium thickness on the red fabric and a black thread of medium thickness on the cream fabric.
- Cotton or linen fabric. The red fabric I used is Kofu tsumugi fabric, the cream fabric I have used in the pictures for the tutorial is Azumino momen. Both types of fabric are ideal for sashiko but you don’t necessarily have to use these. Denim is also a good option for sashiko projects.
- Scissors.
- A pen.
- Carbon paper for embroidery. This is also known as embroidery tracing paper or embroidery transfer paper. I use the chacopy paper made by the Clover company, who also make various bits and bobs for sashiko, but any kind of paper used to transfer embroidery patterns will do.
- My free summer rose sashiko pattern:
I’m going to use the sashiko rose I stitched on the red fabric as part of a patchwork project for a large square coaster/ mug rug. I intend to create and publish other sashiko patterns, one for each season, on this site throughout 2025. So, if you feel like marking each season with a bit of sashiko, keep coming back to A Place Between the Trees and stitch this project along with me!
It helps to have a larger piece of fabric, such as a fat quarter, which you can cut into smaller pieces. This will give you enough fabric to practice with and complete this part of the patchwork project I have planned.

For the sashiko rose patch I intend to use for my patchwork mug rug project, I used a 6-inch x 6-inch square of red Kofu tsumugi fabric.
Step 1:
Prepare your fabric (wash and iron it and cut it to size) and then print off the clover sashiko pattern.
Step 2:


Place your embroidery tracing paper on top of your fabric, with the coated/ chalky side touching the fabric.
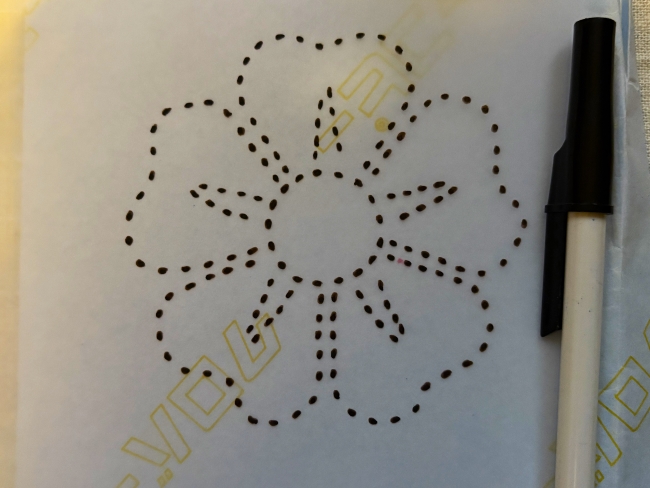
After you have printed the rose sashiko pattern, place the pattern face up on top of your embroidery carbon paper/ tracing paper. Place the pattern and tracing paper on top of your fabric in your desired location. Make sure you place the pattern on the back of the embroidery tracing paper (not the side with the chalky coating, which should be face down against your fabric).
Using a pen, trace the outline of the sashiko pattern. You may need to apply a fair bit of pressure to make sure that the pattern is transferred from your carbon paper/ tracing paper to your fabric.
You may even need to go over the pattern again on the back of your embroidery tracing paper.
Peel the tracing paper away from your fabric slowly, so you can see if the pattern has transferred to the fabric.
Step 3:
Cut a length of thread and thread your sashiko needle.
Do not knot the end of your thread.
Tip: It can be a bit hard to find the ends of a skein of sashiko thread, unlike embroidery floss. It helps to take the paper tube it has been threaded through off and open the skein of thread up by place both your hands through the centre of the skein. The ends of my thread were knotted together.
Step 4:
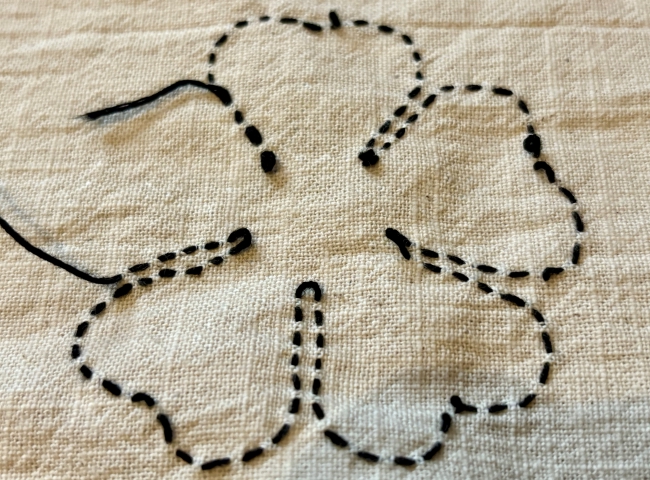
Insert your needle through the back of your fabric, a few stitches into the pattern. For these first stitches, you will be stitching in the opposite direction to that indicated by the arrows on the little diagram included on the pattern.
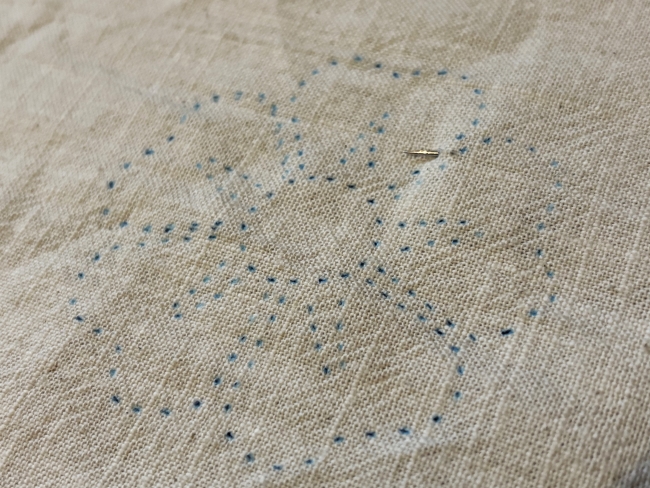
The starting point is on your right, on the right-hand side of the top petal of the rose.
Pick up a few stitches on your needle, with the tip of the needle going back down into the back of your fabric. Push the needle through the fabric. Be careful not to pull the fabric or the thread too tight.
Do not pull all the thread all the way through the fabric. You need to leave a short tail at the back.
Step 5:
From now on you’ll be following the directions on the diagram featured on the pattern.
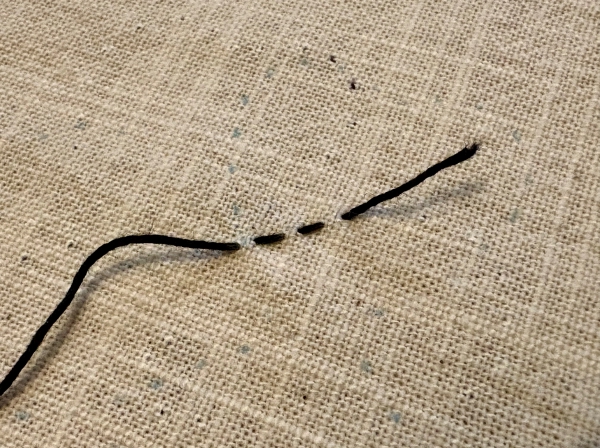
Insert your needle up through the back of your fabric, through the same hole you exited through when you stitched your first few stitches.
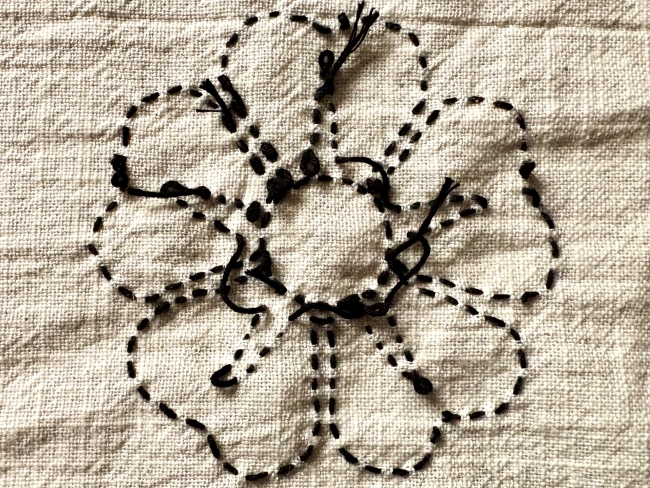
Go over those first few stitches by inserting your needle through the same holes you made earlier. Again, make sure that not all your thread goes through the fabric when you push the needle through it. You need to leave a small loop of thread on the back when you go back through that first hole, like so:

If you don’t do this, prepare to have your stitches unravel.

You may notice that your first stitches and last few stitches in a pattern may look bulkier than the others because your thread has been doubled up in these areas. It’s good to try to be as neat as possible when starting and finishing off but don’t worry too much about some stitches being bulkier in appearance than others.
Step 6:
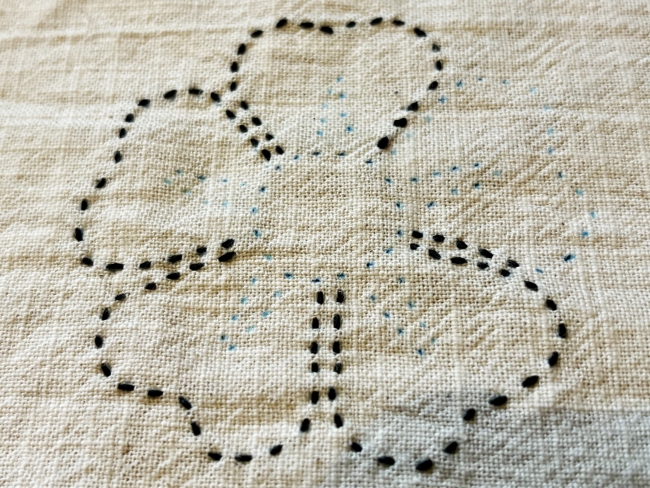
Continue stitching the pattern in the direction indicated by the arrows on the diagram.

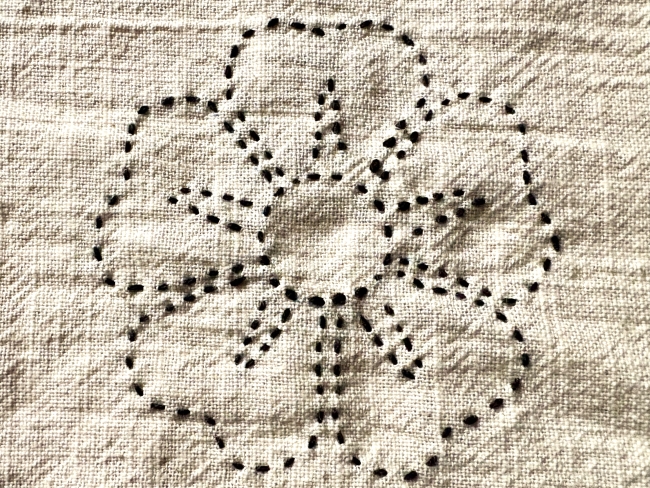
You should start stitching on your right, on the right-hand side of the top petal of the rose. Stitched the outline of each petal, going in a counterclockwise direction. When you reach the dip at the top of each petal, try leaving two small loops of thread on the back of your fabric for the two stitches in the middle. This means that rather than passing the full length of working thread through the fabric, you will leave some a bit loose to keep the tension loose. This helps stop any bunching of the fabric.
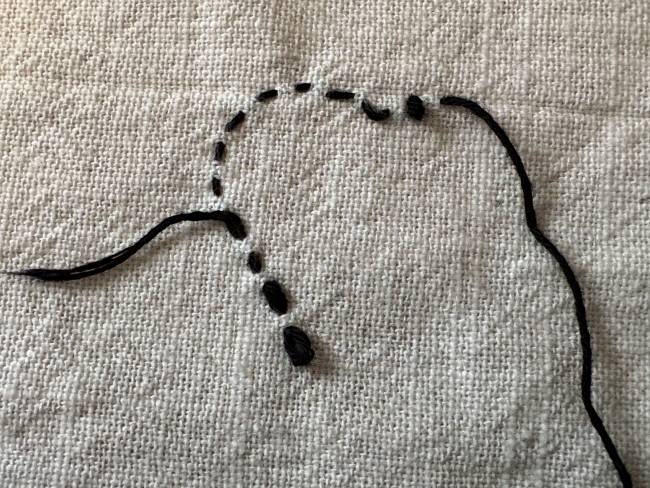
Leave a loop of thread loose on the back of your fabric in the space between each petal as you start to stitch each new petal.
Step 7:
Continue stitching the outline of each petal. When you have stitched the last few stitches, insert your needle up through the back of your fabric, through the same hole you exited through when you stitched the last stitch.
Go over those last few stitches by inserting your needle through the same holes you made earlier. Make sure that not all your thread goes through the fabric when you push the needle through it. You need to leave a loop of thread at the back, just like you did when you started stitching the pattern.
After going over those last few stitches and taking your needle through to the back of your fabric, snip your thread. Leave a short tail of thread on the back of your fabric.
Step 8:
Now stitch the vertical lines on each petal, starting with the top petal.
Start and finish off your stitching the same way you did for the outline of the petals; by going over your first and last few stitches.
I went round in an anticlockwise direction, starting from the bottom of the line on your right-hand side on the top petal.
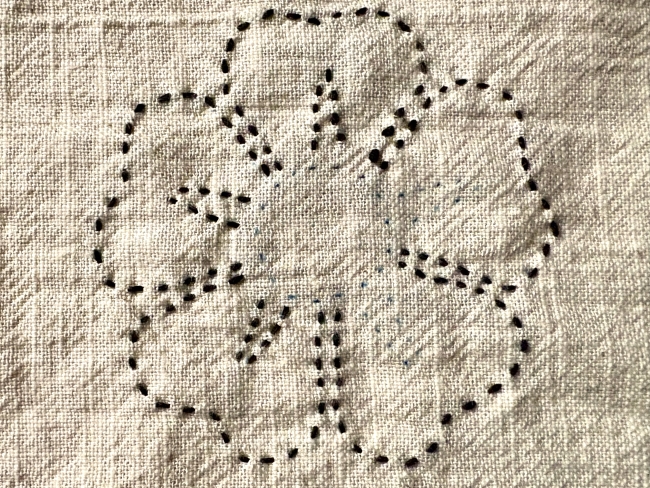
For the set of lines on each petal, I first stitched upwards, left a loop of thread loose on the back (at the top, where the lines come to a bit of a point) and then went down into the line next to the first line, making an inverted V shape, like this: ^
Then I moved over to the lines on the next petal. Whenever I moved on to the lines on another petal, I left a larger loop of thread loose at the back to prevent the fabric from bunching up.
Step 9:
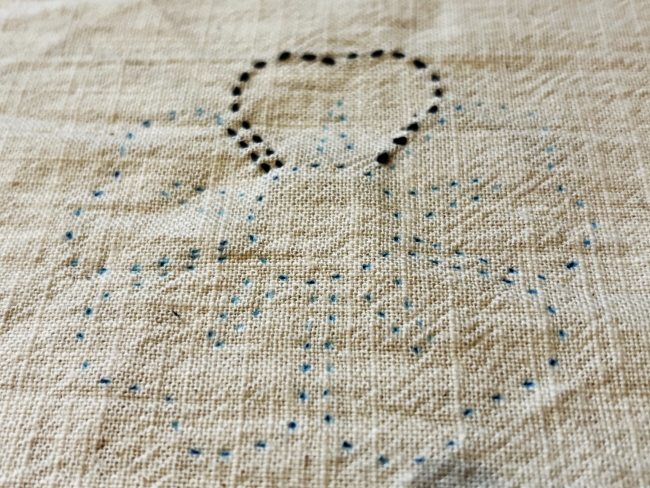
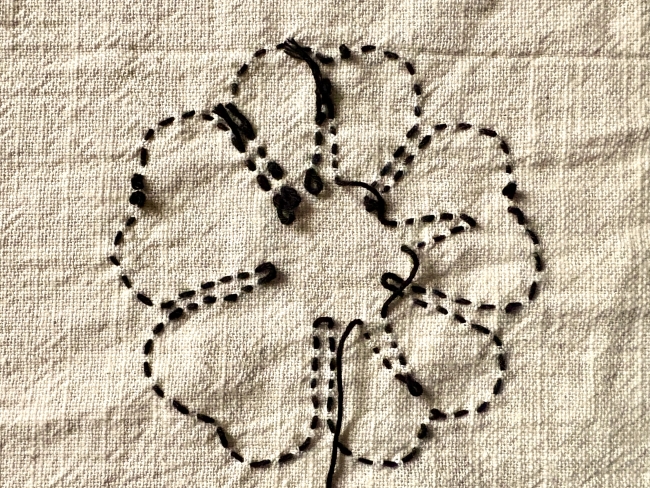
Once you have finished stitching the inverted Vs on each petal, stitch the centre of the rose. This part is very easy because you’re just going around in a circle.
Start and finish off your stitching as you did with the other parts of the rose; by going over your first and last few stitches to secure them, leaving a small loop of thread loose at the back of your fabric.
I hope you have enjoyed stitching this sashiko rose pattern. Join me later in the year for an autumn-themed sashiko tutorial. – Steph
