
Join us for another seasonal sashiko tutorial from Steph. This time we’ll be stitching a sashiko pumpkin as Halloween approaches.
This pattern is part of a project to create a sashiko patchwork ‘mug rug’, with one sashiko panel for each season, as part of the wider The Whitworth in Stitches project. You can find the other patterns for Steph’s sashiko patchwork project and read more about The Whitworth in Stitches project here.
You don’t have to stitch all of the designs I have created for the mug rug but if you fancy doing some more seasonal crafting then look out for the upcoming winter tutorial for this project.
To stitch your own sashiko pumpkin, you will need:
- Cotton or linen fabric. I used ‘mustard’ Kofu Tsumugi fabric for my finished panel.
- Sashiko thread. I used a light grey sashiko thread.
- A sashiko needle.
- Scissors.
- Embroidery tracing paper.
- A pen.
- My free sashiko pumpkin pattern, which you can download below:
The Inspiration for the Autumn Pumpkin Sashiko Pattern
For the autumn panel of my patchwork sashiko ‘mug rug’, I sought inspiration from the Whitworth’s collections and gardens as usual. I started to gather ideas for a mood board, which I would use as a springboard for my autumn-themed sashiko pattern design.
When I first joined the Whitworth in 2018, I was surprised to find out that our volunteers, Cultural Park Keeper and Landscape and Sustainability Technician had been growing pumpkins in one of the beds in the Community Garden. I love Halloween, so this got me thinking about whether there were pumpkins to be found in the Whitworth’s collections. I was not disappointed. After looking through our collections search for a little while, I found a beautiful piece of French silk brocade decorated with a pattern that appears to incorporate pumpkins into the design. It dates from sometime between 1725-1774. The autumnal and now muted colours of the brocade reminded me of the cosy styles many seem to gravitate toward in the autumn.

As beautiful as the design on this cloth is, though, I didn’t think it would translate easily to what I wanted to do with the planned patchwork project. Both of my previous sashiko designs are simple, although my summer rose pattern is slightly more ornate and difficult to stitch for a beginner.
In 2023, I wrote a quick guide for those wanting to try their hand at some autumn-themed doodles. I decided that my simple six-step pumpkin doodles might be a better alternative to the pumpkins on the 18th French textile, but I wanted to improve on the design a bit and make it a bit more complex and pumpkin-like. I added an extra segment to the middle of the pumpkin for my sashiko pattern design. I thought this design would be quick and easy for beginners to stitch. It was also was easier for me, a beginner at creating sashiko patterns, to figure out how the pattern should work by keeping it simple.
Stitching Your Sashiko Pumpkin
Let’s get stitching!
Step 1:
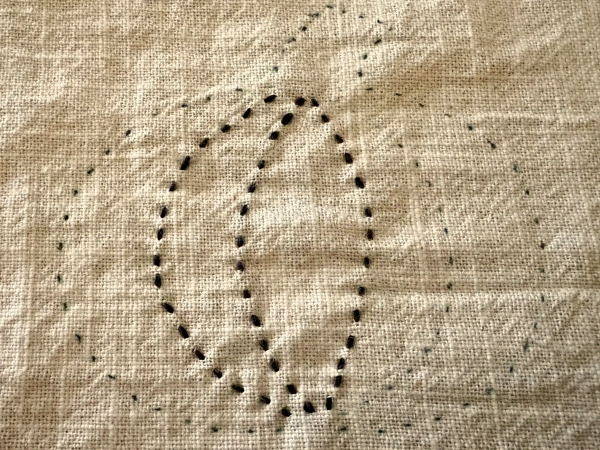
Prepare your fabric (wash and iron it and cut it to size) and then print out the pumpkin sashiko pattern.
Step 2:
Place your embroidery tracing paper on top of your fabric, with the coated/ chalky side touching the fabric.


After you have printed the pumpkin sashiko pattern, place the pattern face up on top of your embroidery carbon paper/ tracing paper. Place the pattern and tracing paper on top of your fabric in your desired location. Make sure you place the pattern on the back of the embroidery tracing paper (not the side with the chalky coating, which should be face down against your fabric).
Using a pen, trace the outline of the pumpkin pattern. You may need to apply a fair bit of pressure to make sure that the pattern is transferred from your carbon paper/ tracing paper to your fabric.
You may even need to go over the pattern again on the back of your embroidery tracing paper.
Peel the tracing paper away from your fabric slowly, so you can see if the pattern has transferred to the fabric.
Step 3:
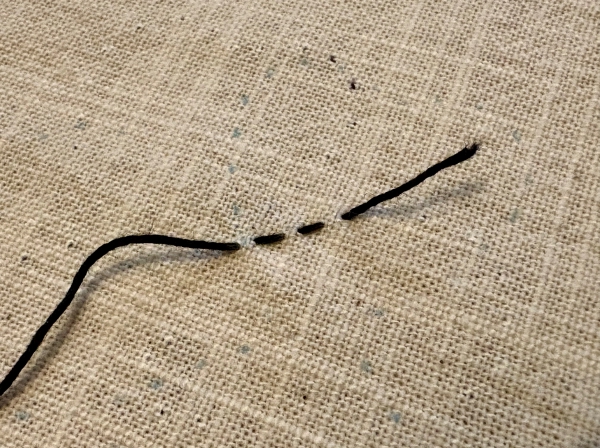
Cut a length of thread and thread your sashiko needle.
Do not make a knot the end of your thread.
Tip: It can be a bit hard to find the ends of a skein of sashiko thread, unlike embroidery floss. It helps to take the paper tube it has been threaded through off and open the skein of thread up by place both your hands through the centre of the skein. The ends of my thread were knotted together.
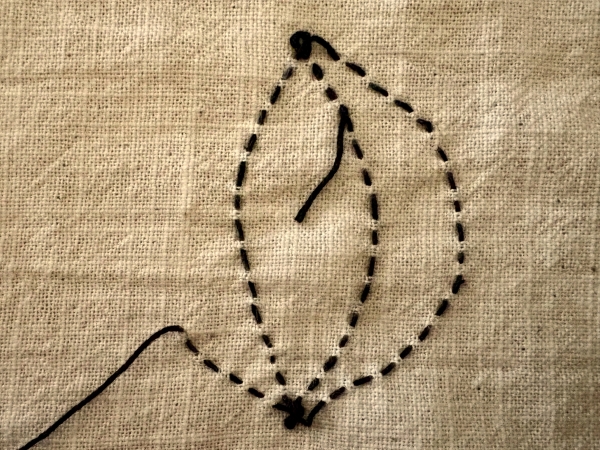
Step 4:
Insert your needle through the back of your fabric, a few stitches into the pumpkin pattern. We’re starting near the centre of the pumpkin.
For these first stitches, you will be stitching in the opposite direction to that indicated by the arrows on the little diagram included on the pattern.

The starting point is on your left, on the upper left-hand side of the middle segment of the pumpkin.
Pick up a few stitches on your needle, with the tip of the needle going back down into the back of your fabric. Push the needle through the fabric. Be careful not to pull the fabric or the thread too tight.
Do not pull all the thread all the way through the fabric. You need to leave a short tail at the back.
Step 5:
From now on you’ll be following the directions on the diagram featured on the pattern.
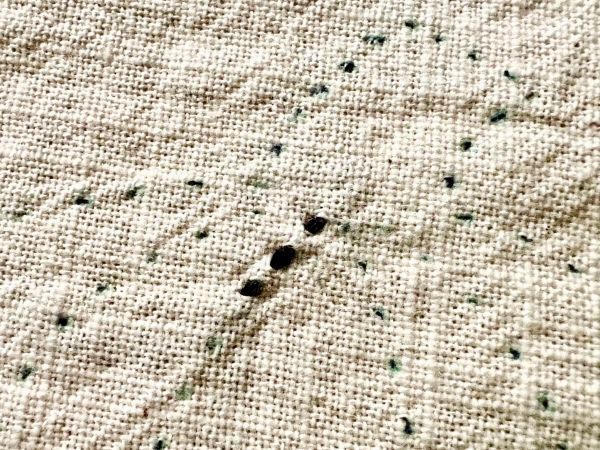
Insert your needle up through the back of your fabric, through the same hole you exited through when you stitched your first few stitches.
Go over those first few stitches by inserting your needle through the same holes you made earlier. Again, make sure that not all your thread goes through the fabric when you push the needle through it. You need to leave a small loop of thread on the back when you go back through that first hole, like so:

If you don’t do this, prepare to have your stitches unravel.
You may notice that your first stitches and last few stitches in a pattern may look bulkier than the others because your thread has been doubled up in these areas. It’s good to try to be as neat as possible when starting and finishing off but don’t worry too much about some stitches being bulkier in appearance than others.
Step 6:
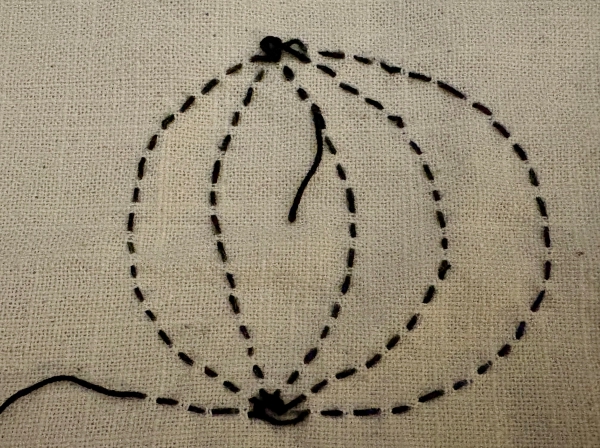
Continue stitching the pattern in the direction indicated by the arrows on the diagram.
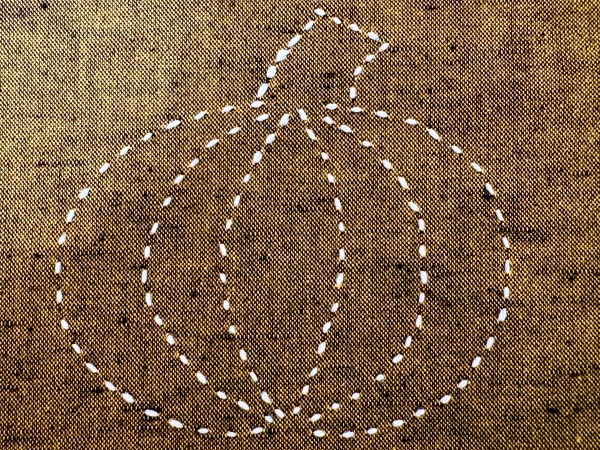
You should start stitching on your left, on the left-hand side of the middle segment of the pumpkin. Stitch the outline of each segment, going in a counterclockwise direction.
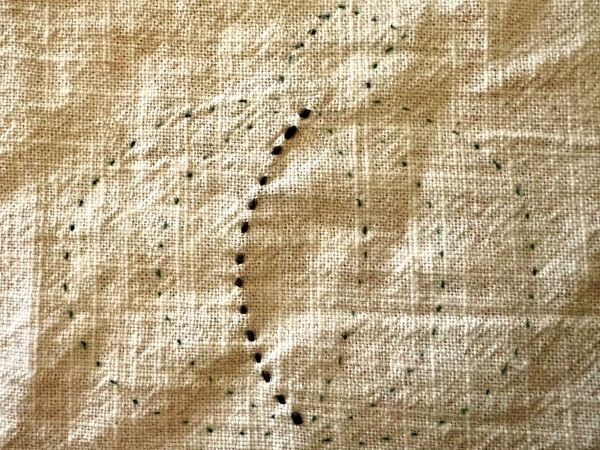
When you reach the gap at the top of each segment, try leaving two small loops of thread on the back of your fabric. This means that rather than passing the full length of working thread through the fabric, you will leave some a bit loose to keep the tension loose. This helps stop any bunching of the fabric.

Step 7:
After you have finished stitching the middle segment, move on to the two closest segments either side of the middle segment, then move on to the two outer segments.


Leave a loop of thread loose on the back of your fabric in the space between each segment.


Step 8:
Finish with the stem/ peduncle.

Whenever you change direction as you stitch the stem, leave a small loop of thread on the back of your fabric.


Go back over your last few stitches to secure them, leaving a small loop of thread on the back of your fabric as you go back in to go over the last three stitches. Snip your thread, leaving a small tail of thread at the back of your fabric.

Your pumpkin is finished!

I hope you have enjoyed stitching your sashiko pumpkin. Let me know what you plan to do with your creation in the comments below. – Steph
