

When we’re children, we often associate Christmas with new toys. Yet so many toys are simply discarded in favour of next year’s hottest selling toys, ultimately ending up in a landfill if they have not been donated to charity or passed on to someone else. New toys can also be very pricey and another big expense is the last thing we need this time of year. The fascination with these more expensive toys can quickly wear off in favour of the packaging they came in or, even worse, you can end up paying out a lot of money for something that doesn’t last very long before it breaks!
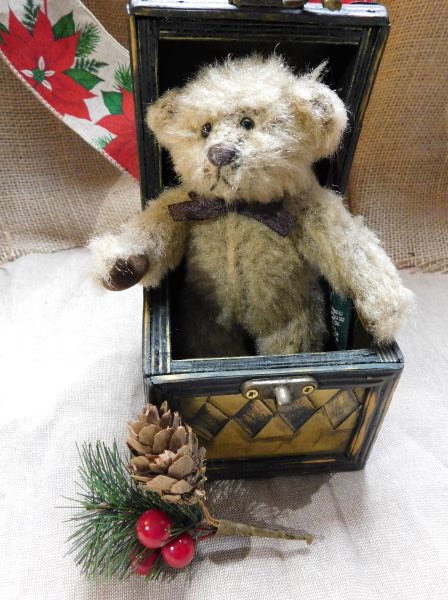
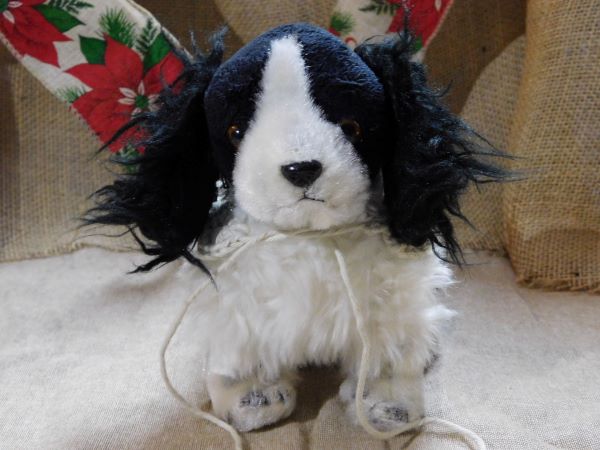
Some of our most treasured childhood toys can actually be very simple, such as something which provides comfort- a teddy bear or another furry friend to snuggle up with during the long winter nights. And regardless of age, we could all use a friend sometimes. It’s worth bearing in mind (no pun intended) that there are also plenty of adults who find soft toys comforting. This can be the case especially for some neurodivergent people. So; if you’re looking to cut the waste (and the cost!) this Christmas, why not gift your loved one with a preloved ‘rescue’ bear or other stuffy?
Where to find cheap stuffed toys? Browse your local charity shops or search through eBay, local facebook buying and selling groups or apps like Vinted for some bargains. You can sometimes find cheap bundles of toys up for grabs on eBay and other digital platforms. Check out whether or not any local community centres and churches are having any jumble or table-top sales to raise funds around the festive season- you might bag some good deals there!

Old TY Beanie Babies can be especially useful as ‘stocking fillers’ if you’re shopping for someone with additional needs. They’re also a cute 90s and early 2000s nostalgia gift. Not only are old Beanie Babies easy to find, most are not particularly expensive and have a few features that may be helpful in providing comfort. Sorry to my fellow 90s children if you collected them; their value is more of the sentimental sort than the monetary kind! Easily tucked away in a bag, they’ll make for discreet travel companions and comfort objects. TY Beanie Babies were deliberately lightly stuffed, which makes them fairly floppy, with the plastic ‘beans’ or pellets that gave them the name ‘Beanie Babies’ also making them slightly weighted- features which may be soothing to people with sensory issues and problems with anxiety. TY produced quite a variety of Beanie Babies, so if someone has a special interest in a particular animal then chances are that there may have been a beanie baby plush of that animal produced. It was probably produced in large quantities (with some exceptions that were regional ‘exclusives’ and are now sold for a higher price)- so they can always get another one as a ‘back up’ in case anything happens to the first!
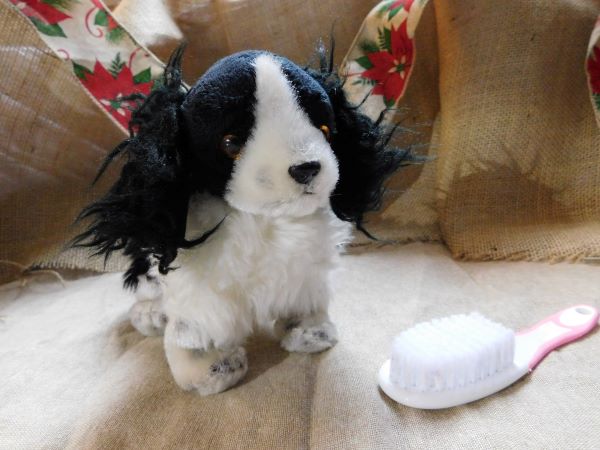
After a thorough cleaning and a quick brushing with a soft bristled brush, lots of old soft toys look loved but also seem to have a new lease on life. A handwritten note or letter detailing their adventures and asking the recipient to take good care of them adds a nice personal touch and will make your thrifted furry friend seem all the more special for whoever you give them to.
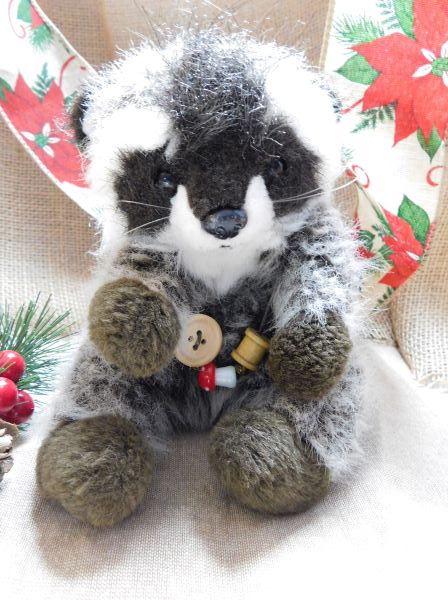
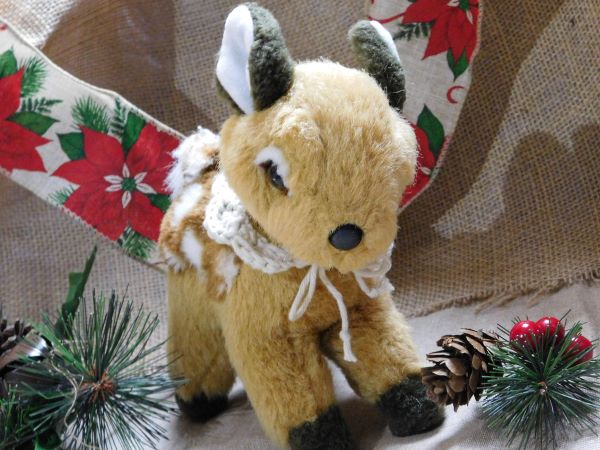
Add a ribbon around the soft toy’s neck or tail to make them appear a bit more dapper or, if you’re quite crafty, why not crochet or knit a blanket, collar, scarf or hat for them using any yarn you may have left over from other craft projects? If you don’t have any ribbon or yarn lying around, you could always tie a bow around their neck or make them a necklace using some twine. If you have any old beads or any of those little jingle bells for crafts lying around from previous festive seasons, or even just an old button, you could add some of those to the twine for a more rustic look.


As for packaging, if you really want to cut the waste you could reuse a cardboard box and tie it shut using some twine or string. Old biscuit and sweet tins would also look lovely for smaller preloved friends. An old square scarf, if you have one, could easily double up as a furoshiki (reusable cloth gift wrap) or you could forgo the wrapping altogether if the recipient lives with you and use Christmas stockings, if you have any at home. It doesn’t have to be elaborate; you could always use a gift bag, which can be reused, or a plain paper bag or brown parcel paper- which can be recycled.
Now that you’re done, just remember; your gift may not be shiny and new but the friend you have selected for the recipient has plenty of character and sentimental value. It may be a simple and inexpensive gift but it is heartfelt. Hopefully the recipient will appreciate the amount of effort you have put into making it extra special for them!
– Steph
Bonus! DIY Crochet Collar Pattern and Tutorial
If you did want to make a crochet collar for your rescue stuffy but aren’t sure how to do it, then read on! Below is the pattern I created for a small crochet collar to fit a soft toy, in addition to some videos I filmed showing you the different stitches you will need to use. Please note that I learned to crochet years ago via Youtube and since most of the best crochet tutorials at the time used US crochet terminology, I learned to crochet using US crochet terminology and thus the pattern uses US crochet terminology.
This project is ideal for using up any small balls of yarn and yarn scraps you have left over from other projects.
You will need:
- A 3.5mm (size E) crochet hook.
- Some cotton aran/ worsted weight yarn. I use Paintbox Yarns. For this project, I used the ‘vanilla cream’ shade of cotton aran yarn by Paintbox Yarns. If you’re not sure where to find nice cotton yarns at a good price, I’d recommend Lovecrafts.com.
- Scissors
Crochet Collar Pattern:
Abbreviated version:
- Slip Knot, leaving a long tail of yarn.
- Ch a multiple of three long enough to go around the neck of your stuffy, plus two more chains. I used 32 ch in total.
- Sc into second ch from hook.
- Sc crochet all along the row of chs.
- Ch 1, turn your work.
- Sc into first st along the row.
- Sk a st, 6 dc into next st along the row.
- Sk a st.
- Repeat: sc, sk a st, 6 dc, sk a st.
- Sl st into last st of row. Cut a tail of yarn, pull through sl st. Use yarn tails to tie the crochet collar around the neck of your stuffy. Trim the tails to your desired length and tie the ends with a simple knot to stop the strands of yarn from separating.
Unabbreviated version for beginners:
- Slip knot, leaving a long tail of yarn you’re going to use as one of the yarn tails to tie the collar around the neck of your stuffy.
- Chain a multiple of three long enough to go around the neck of your stuffy, plus two more chains. I used 32 chains in total.
- Single crochet into the second chain from your hook.
- Single crochet all along the row of chains.
- Chain 1, then turn your work.
- Single crochet into the first stitch in the row.
- Skip a stitch, then do 6 double crochet stitches into the next stitch.
- Skip a stitch.
- Repeat what you just did: single crochet into one stitch, skip the next stitch, 6 double crochet into the next stitch along the row, skip a stitch. Carry this on until the end of the row. I finished the row with 6 double crochet, with one stitch left over at the end.
- Slip stitch into the last stitch along the row (this is the first single crochet you did into your row of chains. It is the stitch which is sort of hanging on the side of the row at the end).
- Cut a long tail of yarn away from your ball of yarn and use your crochet hook to pull that through the slip stitch.
- Trim the yarn tail either end of the collar to your desired length, securing the ends of the yarn tails with a simple knot to stop the strands of yarn from separating.
If you’re new to crocheting and have no idea what I mean by any of those stitches, there are a lot of fantastic tutorials out there on Youtube that can teach you some basic stitching and more but, for the sake of (hopefully) saving you some time, I’ve also filmed some of the stitches using a phone. It turns out crocheting around a tripod is rather tricky, so apologies that they’re not fantastic! I hope that you find them easy enough to follow.
Step One: Slip Knot
This is how you do a slip knot. Remember to leave a long tail of yarn at the bottom of your slip knot, as you will use this to help tie the collar around the neck of your plush toy.
Step Two: Chain Stitch
This is how you do a chain stitch. You ‘yarn over’ (essentially just making sure that the length of yarn you are working with, which is not the tail end, is over your hook) and then pull a loop through the one already on your hook, creating a chain stitch.
I did 32 chain stitches or ‘chained 32’ in total, so that’s my multiple of three plus two more stitches to make sure that I have the correct number of stitches for the pattern to work. As long as you chain a multiple of three, plus two more chain stitches, the pattern should work- so you can alter the pattern slightly by chaining a greater multiple of three, plus two more chain stitches in order to create a collar for a larger soft toy. The extra two chain stitches at the end are just to provide you with a bit of easy movement/ some slack to single crochet into each of your previous chain stitches.
Don’t be tempted to pull any of your stitches too tight! This will make it harder to stitch back into them.
Unpicking Stitches
You can always unpick your stitches if you make a mistake. It’s easy enough to do so, so don’t worry about having to unpick any awry stitches. I do it all the time when I’m not happy with my work. You simply remove your hook from your work and lightly pull on the working end of yarn (the yarn you are using to stitch, not the tail end) and the stitches should unravel.
Step Three: A row of single crochet, starting with a single crochet into the second chain from your hook.
I did not single crochet into the stitch right next to my hook, instead I stitched into the one after it- so you’ll be doing your first single crochet into the second chain stitch from your hook.
This is what is known as a single crochet in US crochet terminology, which is the crochet terminology I use. UK crochet terminology calls this a double crochet, but you don’t need to worry about that for this pattern. I continued to single crochet all along the row, ending up with a total of 30 single crochet stitches- that’s the number of chains/ the multiple of three that I started with.
You can see that as I go into each chain, I ‘yarn over’ and use my crochet hook to grab the working end of yarn (remember this is the longer bit of yarn attached to your ball of yarn, literally the yarn you are using to stitch/ working with, not the tail end!) and pull one loop through the chain, which I leave on my hook. There are now two loops of yarn on my hook. I then go back into the chain and yarn over again to grab another loop of yarn, which I pull through both of the loops which were already on my hook. And that’s a single crochet!
Keep your stitches pretty relaxed- you want to be able to stitch back into them, so don’t pull your yarn too tight- but do not make the tension too loose either. Try to keep your tension the same as you stitch along, so the stitches look consistent.
Step Four: Chain 1 at the end of your row of single crochet and turn your work
Do one chain stitch at the end of the row of single crochets in order to give you some slack, this so you can easily turn your work around and do the stitching which will give the collar a scalloped edge along the row. You do not need to stitch into the chain one later on, it is purely there to give you some slack. For the next row, you’ll be stitching back down the row you just stitched, just on the other side so you end this new row at the end of the collar which does not yet have a long tail of yarn.
Step Five: Repeat: single crochet, skip a stitch, 6 double crochet, skip a stitch
You can see here that I take my crochet hook under the ‘V’ shapes created by the previous row of single crochet stitches. At first I do a single crochet into the first ‘V’ shape or stitch along the row, then I skip the stitch right next to it and do 6 double crochet into the stitch after that. I then skip the next stitch and start the process again with a single crochet. You will repeat this process until the end of the row, when you should have one stitch left over after your last lot of 6 double crochets.
Slip Stitch
A slip stitch is the easiest of the lot but it can be a bit fiddly at the end of this pattern because the last stitch in the row, which you will slip stitch into, is actually sort of on the side of the row.
A slip stitch basically consists of going into a stitch, grabbing one loop of yarn from your length of working yarn and then pulling that loop through the loop already on your hook fro the stitch you did before the slip stitch. It’s the same sort of thing you did to create your chain stitches. It’s not quite a single crochet in US crochet terminology (although confusingly it is a single crochet UK terminology, but I digress.)
You’re going to use this slip stitch to finish your work, so cut a long tail of yarn from the working end of yarn. When you pull the loop you have grabbed from the working yarn through the loop of yarn which is already already on on your hook, you will pull this tail all the way through the loop already on your hook.


Now you just need to tie the collar around the neck of your soft toy using the tail you have at either end of the collar. Once you have done that, trim the tails to a length you are happy with and tie a simple knot close to the end of each tail to prevent the strands of cotton yarn from separating.
I hope that you have found this tutorial useful.
Happy stitching!
