
Steph gives us a very short history of the needle case and, inspired by one in our collections, which was made by former Whitworth director Margaret Pilkington, she teaches you how to make your own.
Do you want to see other posts from our Whitworth Advent calendar? Click here.
A Short History of the Needle Case
If you want to skip ahead to the tutorial, click here.
Anyone who sews needs a place to store their needles, in case they roll away and disappear into carpets and sofas. Needles were just as easily lost in the past, so it is unsurprising that the needle case has a long history. Needle cases have been found in the remains of Viking settlements and later medieval sites. They have survived because they were made of more durable materials such as bone and bronze, however needle cases have been made of many different kinds of materials throughout the centuries.[1] These means of storing sewing supplies have taken many different forms, from needle cases which resemble books with fabric ‘pages’ to carved tubes and novelty shapes.
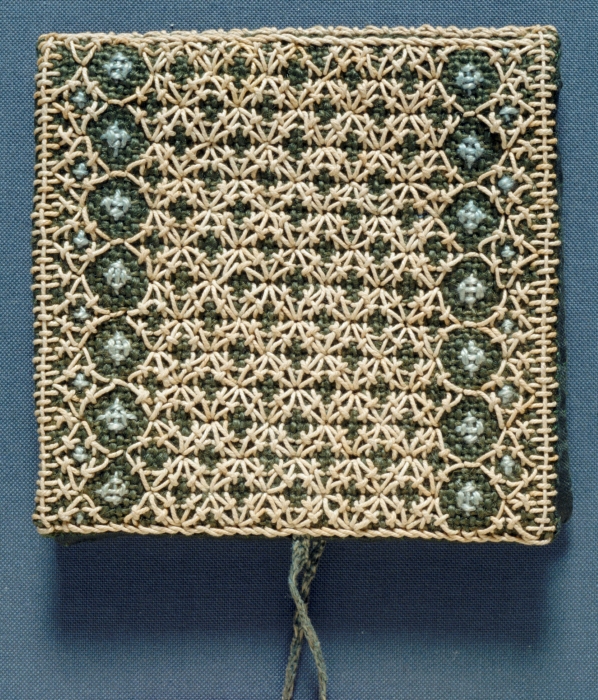
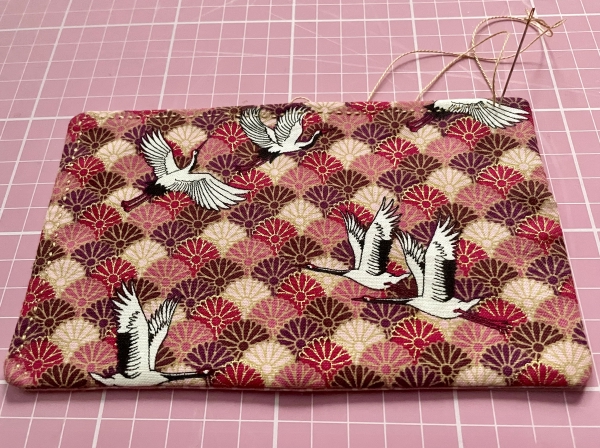
Some have had little decoration and others have been more ornate. Some have been beautifully embroidered, decorated with beads or skilfully engraved. If you search for ‘vintage needle case’, you will encounter many nineteenth and early twentieth century cases in a wide range of shapes and sizes. There is a rather beautiful needle case in the Whitworth’s collections made by Margaret Pilkington, artist and former Honorary Director of the gallery, who you can read more about in a post written by my colleague Sue here.
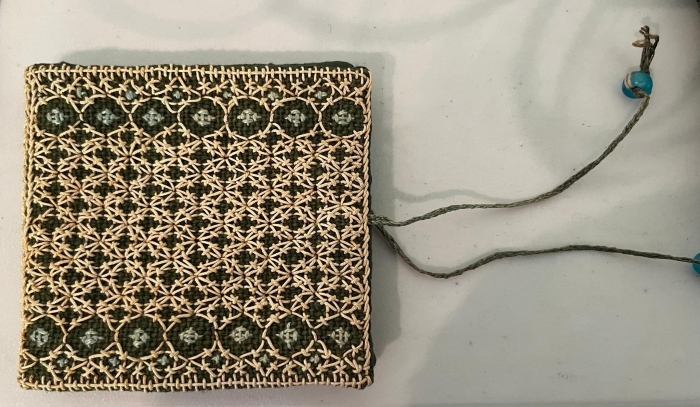
The case is embroidered and was made in the book shape format many needle cases take today. The case has ties attached to it and a small bead, in a shape normally sold and referred to as ‘seed’ or ‘pony’ beads today, sits the end of each tie. Stitched into one of the ‘leaves’ or ‘pages’ of the case are words attributed to Charlemagne’s son Pippin and Alcuin (c.740-804) These words are taken from riddles which were framed as a dialogue between the two.[2] The text is is known as the Disputatio regalis et nobilissimi iuvenis Pippini cum Albino scolastico and was written by Alcuin during the 790s.[3] Martha Bayless states that the Pippin of Alcuin’s Disputatio Pippini is ‘almost certainly’ the younger of the sons of Charlemagne to be referred to as Pippin or Pepin (there were two Pippins, this one was Pippin/ Pepin of Italy).[4]
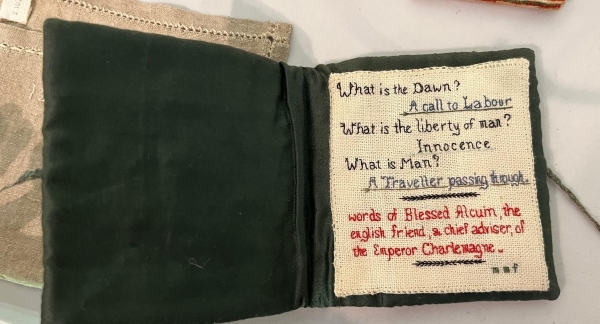
The embroidery of an extract from the Disputatio featured on Pilkington’s needlecase reads:
What is the dawn?
A call to Labour
What is the liberty of man?
Innocence
What is Man?
A Traveller passing through
words of Blessed Alcuin, the english friend, & chief advisor, of the Emperor Charlemagne.
m m f
Fun festive fact: On Christmas Day 800 CE Charlemagne was crowned emperor of the Romans by Pope Leo III. This title was given to Charlemagne after he helped to restore Leo III to the papacy following a rebellion instigated against the pope by aristocrats in Rome.

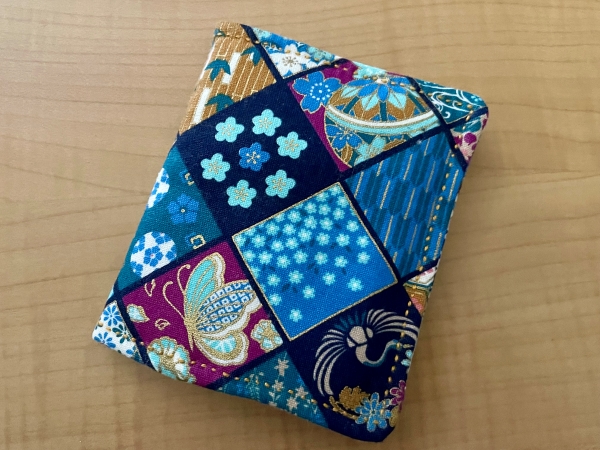
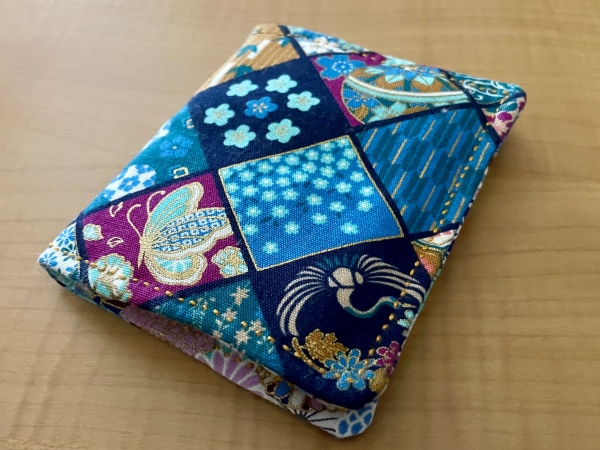
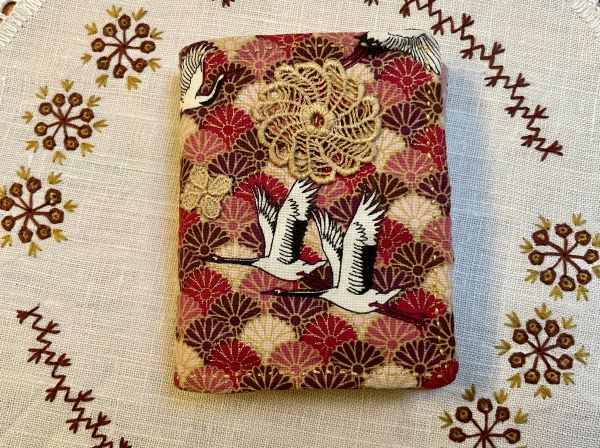
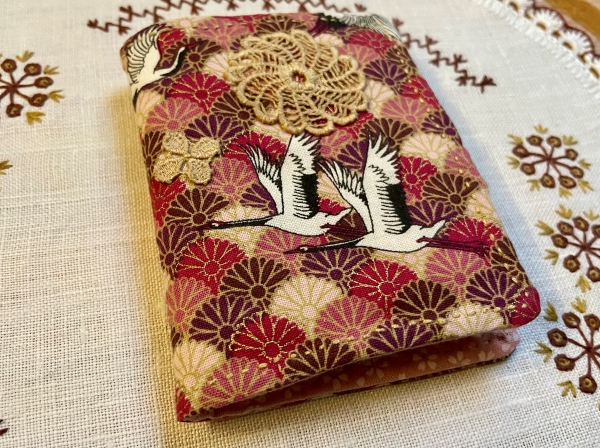
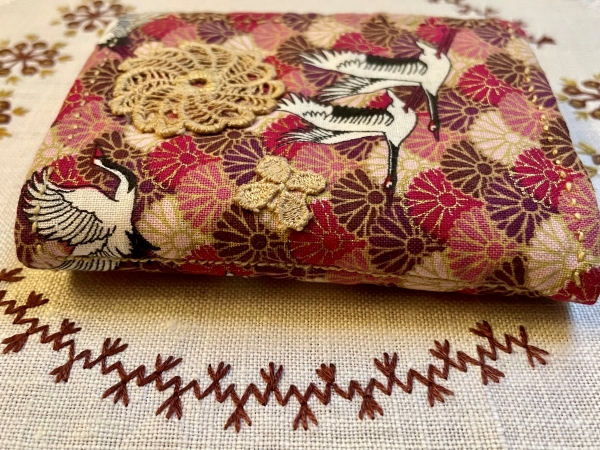
Sew Your Own Needle Case
Inspired by Margaret Pilkington’s needle case, I thought it would be nice to create a pattern and tutorial for a practical gift. A needle case will come in handy any time of year, so if you don’t have time to make one for Christmas you can add this to your list of craft projects for next year.
I’ve tried to keep things as simple as possible (this tutorial was made with complete beginners in mind) but feel free to make any adjustments you like to the pattern.
You can sew this project by hand or you can use a sewing machine.
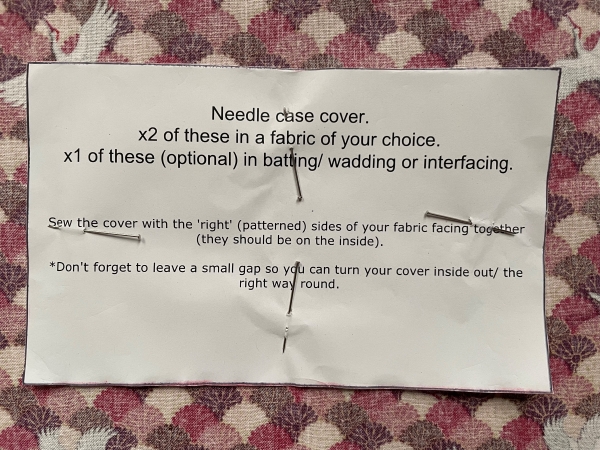
You will need:
- Cotton fabric or fabrics of your choice
- Cotton batting/ wadding or interfacing fabric to make the cover of your needle case feel a bit more sturdy. *I usually buy wadding in the ‘crib’ size (which is 45″ x 60″), as I only use it for small projects- it goes a long way and it’s cheaper for me to buy it in that size. The brand I use is Warm & Natural.
- Cotton batting/ wadding or felt to create the ‘pages’ of your needle case cover.
- Cotton perle thread. I used size 8.
- An embroidery needle with a eye large enough to thread cotton perle thread through.
- A smaller needle for sewing.
- Thread for sewing. I used Aurifil 50wt cotton thread.
- Pins.
- Scissors.
- Fabric clips (optional).
- Tailor’s chalk, a tailor’s pencil or an ordinary pencil.
- Pinking shears (optional).
- Any bits and pieces of lace or other decorations you want to add to your cover (optional).
- Embroidery floss in a colour of your choice (optional- I just used the same perle thread I used for attaching pieces of lace to my needle case cover)
- The free pattern below:
Step One:
Print and cut out the free needle case pattern above.
Once you have cut the pattern out, set the smaller piece for the ‘pages’ of your needle case aside.
Step Two:
Pin the needle case ‘cover’ pattern piece (the larger pattern piece) to the wrong side (back/ plain side) of one of your chosen fabric pieces. Use the piece you want to form the outer layer of your needle case cover once it had been sewn together and folded into a book format. If you are using plain cotton fabric, the ‘wrong’ or ‘right’ side doesn’t really matter.
Draw around the pattern piece using a pencil, tailor’s pencil or tailor’s chalk.
Step Three:
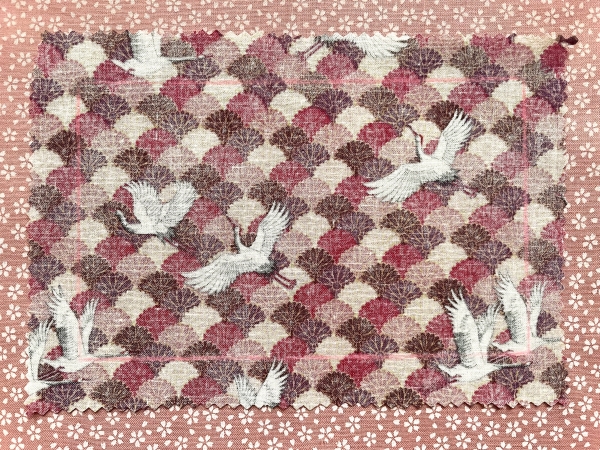
Making sure to leave some space around the lines you just drew around the pattern piece, cut out a rectangle of fabric. Leave yourself a decent seam margin (the space around the lines). If you are worried about your fabric fraying and you have pinking shears, you can use those to cut out your fabric instead of scissors. I gave myself a large seam margin for the case I have used in most of these photos but you don’t have to use such a large seam margin, especially if your fabric isn’t as prone to fraying.
Skip the text in italics if you do not want to add any embellishments to the top layer of your needle case cover.
If you are going to embroider your needle case cover or add any embellishments, you should do so before you start to stitch the pieces of the cover together. You will need a needle with a large enough eye to accommodate your embroidery floss. You can stitch bits of old lace onto the front of your cover by creating small couching stitches with some of strands of embroidery floss or some cotton perle thread to secure different parts of the lace.
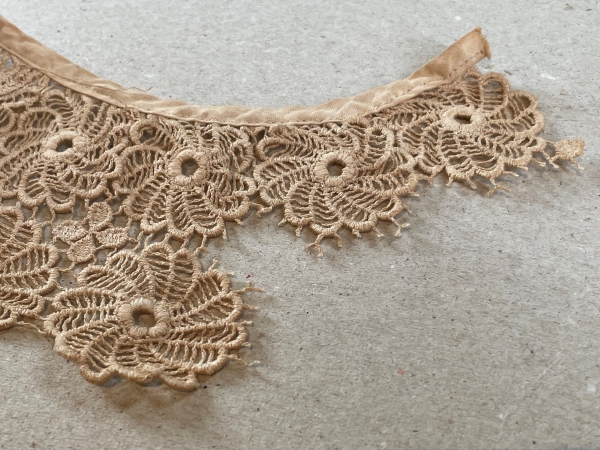
First I cut the pieces I wanted to use as embellishments from the piece of a lace collar I had bought. 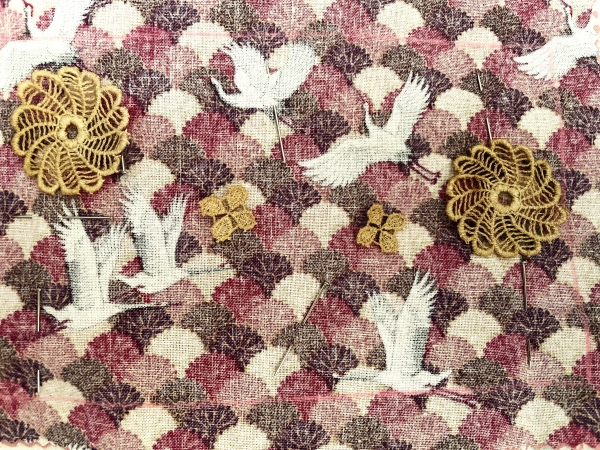
I positioned the lace pieces on the back of the front layer of the needle case cover (where I had already drawn around the pattern piece), just to check if they would fit into the confines of the rectangle. 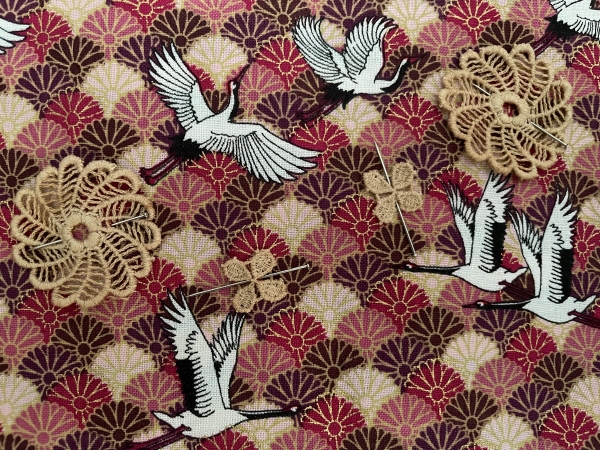
I then pinned the lace pieces into position on the front of the top layer of my needle case cover. 
I couched the lace into place. 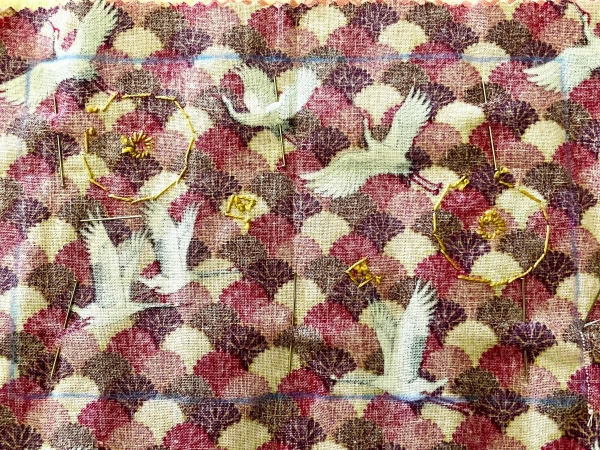
Here’s the back of the top layer of my needle case cover after all of the lace was stitched down on the front.
I made use of the scrap of a lace collar I bought at a textiles fair to use as embellishments for projects like this.
I decided to use the embellishments on a needle case cover I had already started to prepare. To make sure they would fit within the borders of the rectangular needle case cover I was going to sew, I positioned them on the back of the layer of fabric which was going to form the outside of the cover of my needle case once it was folded into a book shape. I had already drawn around the pattern piece for the cover on the back of this piece of fabric in order to act as a guide when I started to stitch the case cover together.
After taking a photo of the embellishments within the borders of the rectangular shape I was about to sew to create my needle case cover, I unpinned the layers of fabric and positioned the lace pieces where I wanted them on the front of the cover. Then I pinned them into place.
I already had a cotton perle thread in a similar colour to the pieces of lace I was using as embellishments, so I used that instead of embroidery floss. I stitched the embellishments into place by couching over parts of the lace. For the flower shapes, I couched over parts of the centre of the flower and down into the base of the petals. I also did a small stitch over the outer edge of each petal.
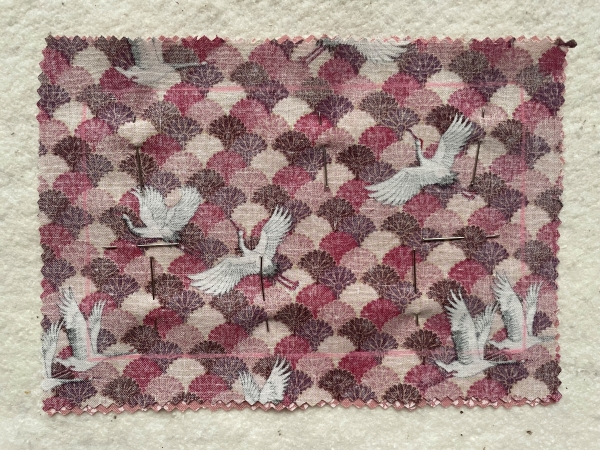
Then I pinned my needle case cover back together with the ‘right’ (patterned) sides facing each other and began to stitch it all together.
Step Four:
Unpin the pattern piece from the piece of fabric you just cut out.
If you are using a plain fabric for both sides of your needle case cover and the fabric is plain, pin the fabric piece you have just cut out onto the fabric you will be using for the other side of your needle case cover. Cut around the piece of fabric with the outline of your needle cover on it.
If you are using patterned fabrics, place the piece of fabric you cut out earlier on the fabric you are going to use for the other side (the inside) of your needle case cover. Pin it so that the the right sides (patterned sides) of your fabric are facing together. Cut around the piece of fabric with the outline of your needle cover on it.
Step Five:
If you are using cotton batting/ wadding:
Place the two pieces of fabric you have just cut out onto your cotton batting/ wadding and pin them to it. Cut around your fabric, so that you have a sandwich of two pieces of fabric together against a piece of batting.
If you are using interfacing:
Iron the interfacing onto the back (wrong) side of the piece of fabric you want to use as the front of your needle case cover.
Step Six:
Thread your needle, doubling up the thread. Secure the ends of your thread with a knot.
Going around the rectangle shape you drew on your first piece of fabric, stitch the sandwich of fabric and batting together using backstitch.
*Remember to leave a small gap so you can turn your work inside out/ the right way round!
*In order to avoid your thread getting tangled up, ideally you want to keep your doubled up thread no longer than the length of your forearm. As you come to the end of your thread, you can secure the ends with a small knot before snipping off any excess thread.
See below if you’re not sure how to backstitch:
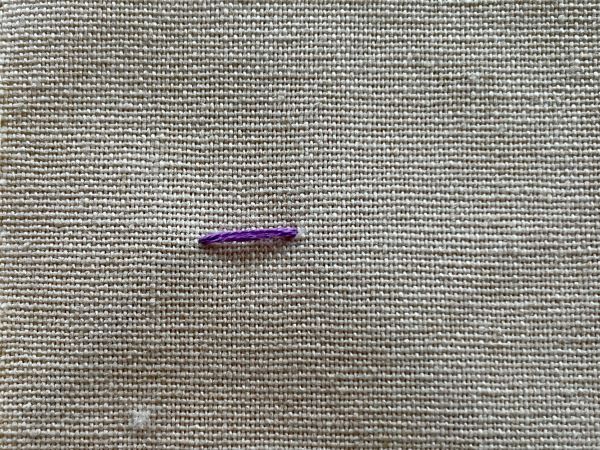
Backstitch. Start with a normal stitch. 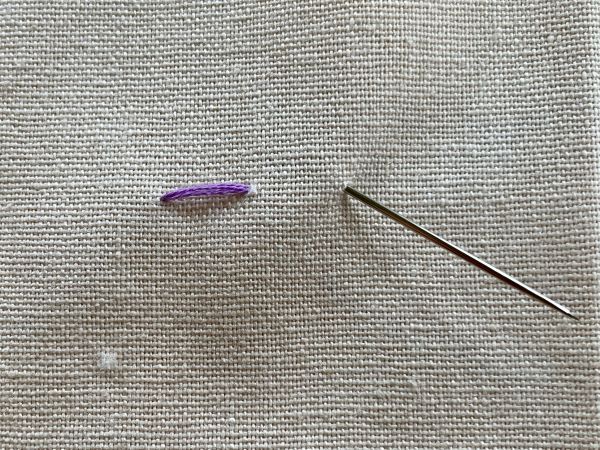
After completing your first stitch, insert you needle through the back of the fabric a stitch length away from your previous stitch. 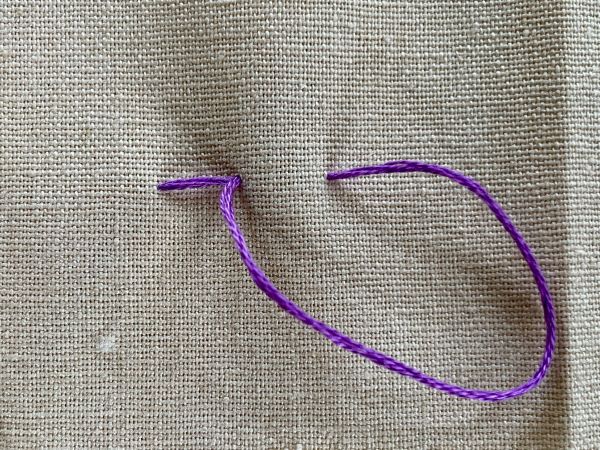
Insert your needle into the point where your first stitch ends. 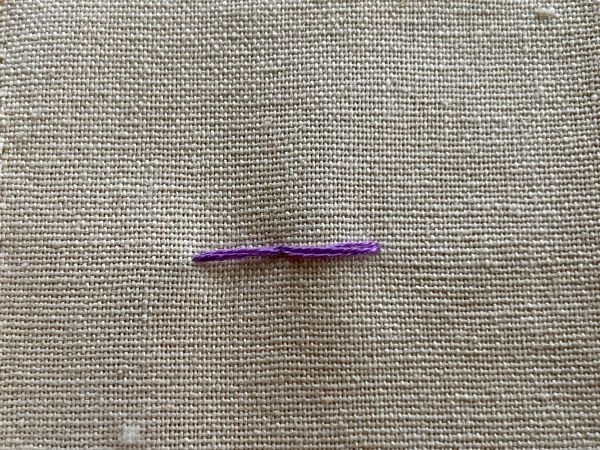
Continue bringing your needle back through your fabric a stitch length away from your previous stitch and then going back into the hole where the previous stitch ends.
Step Seven:
When you have finished stitching, turn your work inside out (the right way round). You may want to trim down your seam allowance first- just don’t snip any of those stitches! To make sure the corners look nice when the cover is turned the right way round, you can snip off a bit of seam allowance closer to each corner. You’ll basically be snipping off little triangles of excess fabric. Again, be careful not to cut through any stitches.
When turning the cover the right way round, it may be helpful to use the blunt end of a pencil or a chopstick to make sure the corners are fully turned out.
You have almost finished the cover of your needle case.
Stitch the gap you used to turn your needle case cover the right way round closed. Use ladder stitch (also known as hidden stitch) to do this.
Iron the cover of your needle case to remove any creases. You can also fold it in half and press the cover into position (so it looks like a book cover) now, or wait until later if you are going to do any additional stitching around the edges to give it a more handmade or finished look.
Step Eight (optional):
If you wish to do so, you can give the needle case cover a more handmade or finished look by adding some topstitching. You can do this by adding a running stitch around the edges in cotton perle thread. You will need a needle with a larger eye, such as an embroidery needle, to accommodate the perle thread. Do not double the thread up.
I hid the ends of my thread under the layer of fabric on the inside of my needle case cover. I used a quilter’s knot, which can be pulled through a layer of fabric and hidden underneath, to secure the ends of my thread.
Fold the needle case cover in half and iron/ press it into position (so it looks like a book cover).
Step Nine:
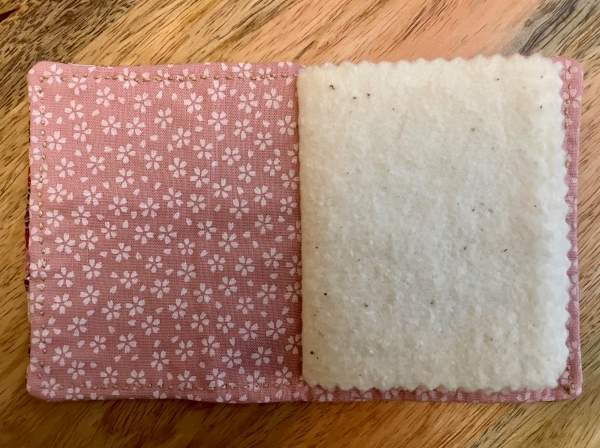
Pin the pattern piece for the ‘pages’ of your needle cover (the smaller pattern piece you set aside earlier) to your cotton batting or felt. Cut around the pattern piece. You don’t need to leave a seam margin this time.
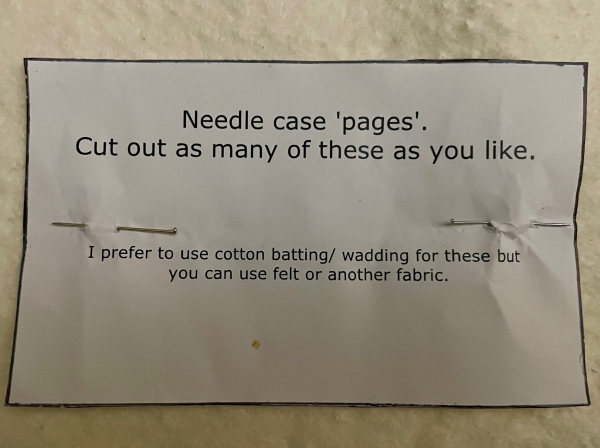
Cut out as many ‘pages’ as you like. Just be aware that when your needle case is completed, these will be folded in half as your needle case will form a book shape, so although you can cut out more ‘pages’ if you want, three to four is a good number. This is especially true if you are using cotton batting, as it feels a bit bulkier than felt.
I don’t really like the texture of a lot felt fabrics and I already had cotton batting at home, so I used cotton batting for the ‘pages’ of my needle case. Neither fabric really seems to fray, or at least it doesn’t fray easily in the case of the batting I use. One advantage of felt is that you can buy both acrylic felt and wool felt in a wide range of colours, so if you want the interior of your needle case to be more colourful then felt may be the best choice for you.
I used pinking shears because I like the zig-zag pattern they leave on the edges of your ‘pages’ but you can just use scissors if you don’t have any pinking shears.
Step Ten:
Once you have cut out the ‘leaves’ or pages for your needle case, stack them one on top of the other and position them on the inside of your needle case cover.
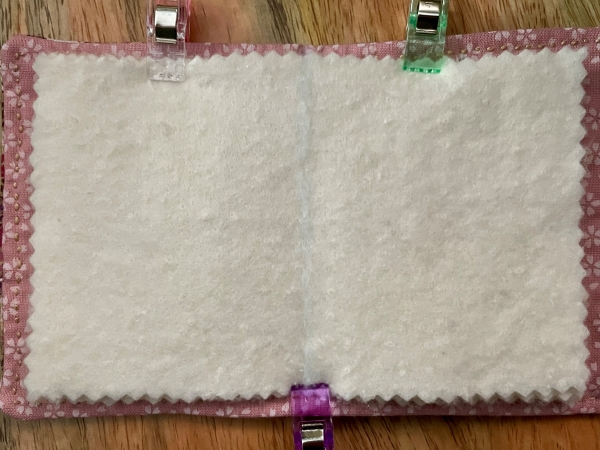
Either pin the pages in place of clip them in place.
Using a pencil, tailor’s chalk or a tailor’s pencil, draw vertical line down the centre of the ‘page’ on the top of the pile. Make sure this line is lined up with the fold which formed when you ironed the needle case cover into a book format.
Step Eleven:
Thread your embroidery needle with cotton perle thread. Do not double the thread up.
Tie a quilter’s knot into the end of the thread and then place the tip of your needle underneath the inner layer of fabric on your needle case cover. Pull the needle through the fabric and tug the end of the thread so that the knot disappears inside your needle case cover.
Step Twelve:
Starting from the top of the centre of the ‘pages’ of your needle case, begin to attach them to the cover by backstitching down the line you drew on the ‘page’ at the top of the pile. Go over the first stitch once to make it more secure.
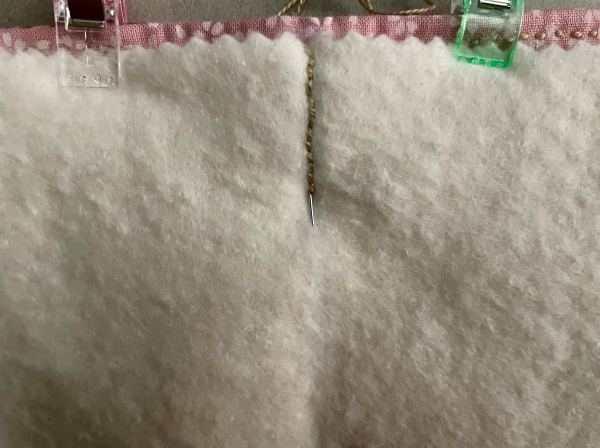
It helps to turn your needle case over now and then to check that the stitching runs as close to the centre or ‘spine’ of the needle case cover as possible. Use the fold you ironed into the needle case cover to guide you.
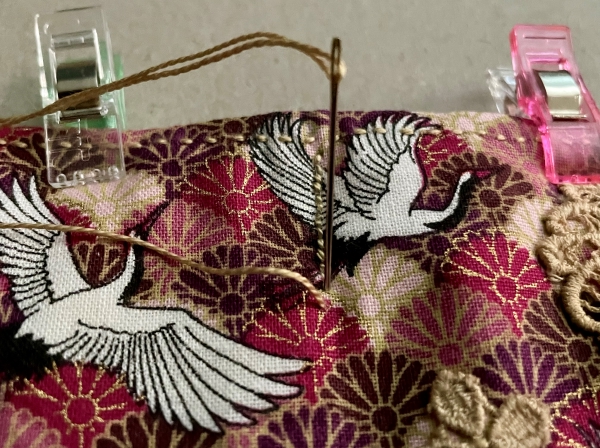
Step Thirteen:
Once you have reached the bottom of the line which runs down the centre of your pages, go over your last stitch to make it more secure.
After you have secured your last stitch, make a quilter’s knot at the end of the thread which is closest to your last stitch. Place the tip of your needle under the fabric which forms the inner layer of your needle case. Pull the needle out of the fabric at the bottom of your needle case.
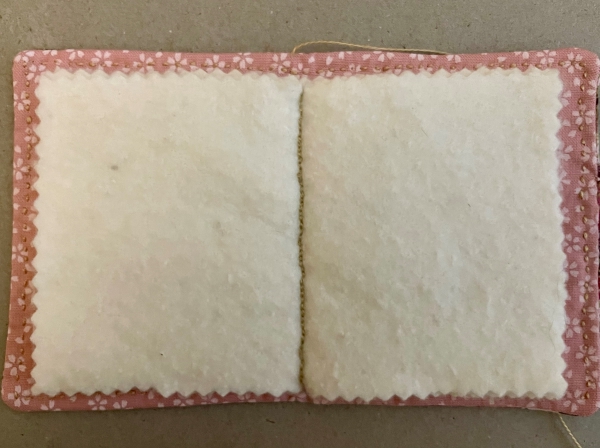
Snip the excess thread.
Enjoy your completed needle case!
–Steph
References
[1] Mary C. Beaudry, Findings: The Material Culture of Needlework and Sewing (Yale University Press, 2006), pp. 71-72.
[2] Martha Bayless, ‘Alcuin’s Disputatio Pippini and the early medieval riddle tradition’, in Guy Halsall (editor), Humour, History and Politics in Late Antiquity and the Early Middle Ages (Cambridge, 2002), pp. 164-165.
[3] Bayless, ‘Alcuin’s Disputatio Pippini and the early medieval riddle tradition’, in Guy Halsall (editor), Humour, History and Politics in Late Antiquity and the Early Middle Ages (Cambridge, 2002), p.166.
[4] Bayless, ‘Alcuin’s Disputatio Pippini and the early medieval riddle tradition’, in Guy Halsall (editor), Humour, History and Politics in Late Antiquity and the Early Middle Ages (Cambridge, 2002), p.164.
Bibliography
Mary C. Beaudry, Findings: The Material Culture of Needlework and Sewing (Yale University Press, 2006).
Martha Bayless, ‘Alcuin’s Disputatio Pippini and the early medieval riddle tradition’, in Guy Halsall (editor), Humour, History and Politics in Late Antiquity and the Early Middle Ages (Cambridge, 2002), pp. 157-178.
Matthias Becher (author) and David S. Bachrach (translator), Charlemagne (Yale University Press, 2003).
D. A. Bullough, ‘Alcuin [Albinus, Flaccus] (c.740-804), Oxford Dictionary of National Biography [https://doi.org/10.1093/ref:odnb/298, accessed 28 October 2024]
E. Ann Matter, ‘Alcuins Question-And-Answer Texts’, Rivista di Storia della Filosofia Vol. 45, No. 4 (1990), pp.645-656.
Ingvild Øye, Tracing Textile Production: From the Viking Age to the Middle Ages (Oxford, 2022).
Andy Orchard, ‘Alcuin’s Educational Dispute: The Riddle of Teaching and the Teaching of Riddles’, in Susan Irvine and Winfried Rudolf (editors), Childhood and Adolescence in Anglo-Saxon Literary Culture (University of Toronto Press, 2018), pp. 162-201.
John Osborne, Rome in the Eighth Century: A History of Art (Cambridge University Press, 2020).

Beautiful work
LikeLike
Glad you enjoyed it! Did you ever see Pilkington’s needlecase on display?
LikeLike