
In this post, Steph shows you a quick and easy way of making your own reusable wipes. You can use up that fabric you bought a while ago and haven’t touched or use an old item of clothing and help reduce waste!
Trying to keep yourself occupied? A lot of people are picking up new hobbies and trying their hand some sort of craft during the current pandemic. I’m very much the sort of person who likes quick and easy craft projects. I will not emerge from this pandemic as a master of any kind of craft. I probably won’t even finish some of the projects I have in mind, if I start them at all. Although I really admire the creativity of others, when it comes to crafting I myself lack the skill and patience to do anything even remotely complicated.
Despite this, I’m very much a fan of trying to make gifts when I can. It adds a nice personal touch, can be fun to do and saves me having to brave crowds during the festive period. It can also be friendlier to the environment, depending on the kind of materials used and how much use a person might get out of whatever you make. Reusable makeup wipes are very popular these days and are not only a more eco-friendly alternative to single-use disposable wipes, they can be a prettier alternative too! They’re also really easy to make.

You can use these wipes to remove makeup and creams and then pop them in the wash and use them again! They’ll save you money in the long run and you won’t have to toss them away after a single use. These wipes can be made with materials that you may have at home. Perhaps you don’t have a piece of fabric you have been meaning to use for a craft project lying around at home but you may well have a piece of clothing that you just don’t wear anymore or a towel you don’t use!
Materials

You will need:
-An old piece of clothing or some fabric of your choice. Soft brushed cotton/ flannel pyjamas or a shirt would be a good choice here, as would a soft cotton towel. You can get some lovely bamboo towelling fabric, which is very soft but quite a bit more expensive than cotton.
-Thread- if you use a polyester thread but use natural materials like cotton for the main body of your wipes, the thread will have to be unpicked if you ever want to recycle the fabric of your wipes. Cotton thread has the unfortunate habit of snapping a bit more often than polyester threads do sometimes but it should be OK if you are hand sewing.
-Needle (if you’re not using a sewing machine).
-A piece of tailor’s chalk, fabric maker or a pencil.
-Scissors or pinking shears. Pinking shears will help to reduce fraying, so they’re a good option if the fabric you are using frays a lot.
-Something square or round to draw around. A square shape might mean that you use less fabric overall, although you should give yourself a good seam allowance if the fabrics you are using fray a lot. I used a coaster and a pad of post-it notes to draw around.
Make sure the fabric you use for the part of the wipe that will remove dirt and makeup is not going to be rough on the skin. You could make both sides from the same fabric and get more use out of them that way, or you could have one side as a more decorative feature.
Cutting the Fabric

My skills at pattern making are practically non-existent but you don’t really need a pattern to make these wipes. I opted to make square shaped wipes because I knew that I’d end up using less fabric that way. I wanted to make some of these as gifts, so for this project I used two types of cotton fabric that I’ve had for a while. For one side of the wipes, I used a Japanese cotton fabric which has a lovely pattern on one side. I used a tough but soft cotton towelling fabric for the side of the wipes that will be used to remove dirt and makeup. Some of the best reusable wipes I have seen have been made from old clothing, though, so you don’t really have to worry about buying fabric! I’m just trying to use up fabric I have had for a while.
Step One: Decide how many wipes you want to make. I wanted to give these wipes as gifts in bundles of five, so I needed five squares cut from one of my fabrics and five squares from the other.
Step Two: Draw around whatever you’re using to make the shape of your wipes on the ‘wrong’ side of your fabric until you have as many pieces for one side of your wipes as you need.The ‘right’ side of your fabric is the one you want to be on display when your wipes are finished. It may be that both sides of your fabric are patterned or plain but one side of the fabric is softer or has a nicer texture than the other, so draw on the other side that you don’t want to come into contact with the recipient’s skin.
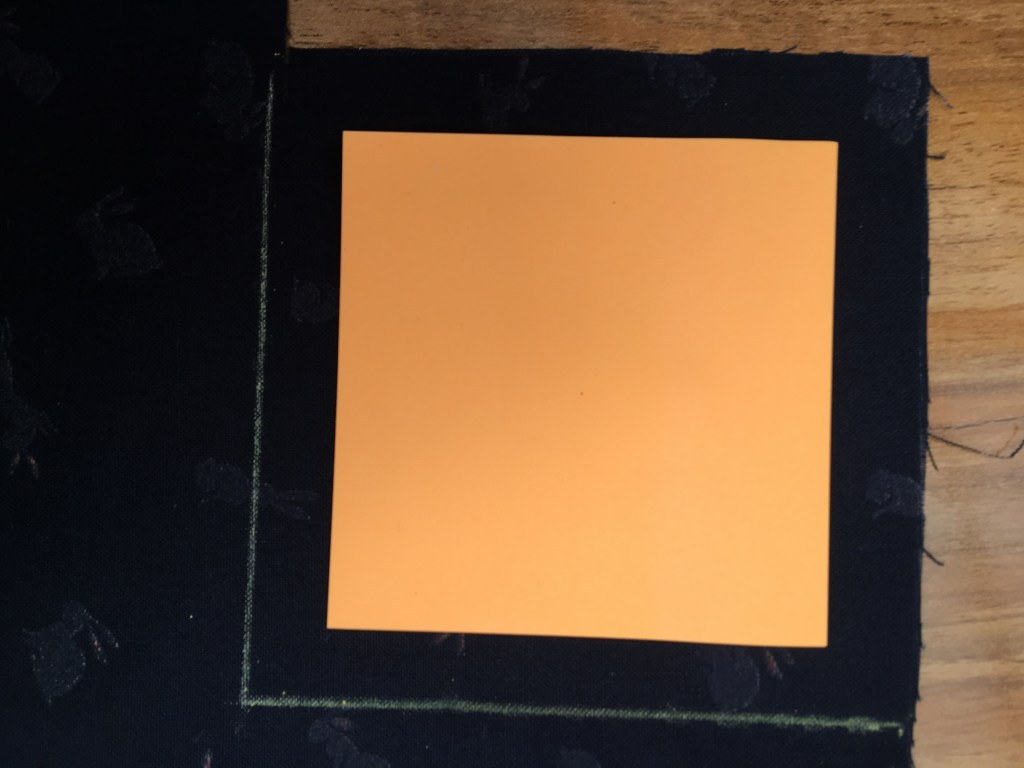
Step Three: Draw another square or circle inside your first shape, with a decent amount of space between that and your first shape. You need to give yourself some seam allowance.
I drew around a coaster with a piece of tailor’s chalk on my patterned fabric and then, inside that square, drew around a post-it note with the tailor’s chalk so I knew where to stitch. The fabrics I was using fray quite easily, so I chose something that would fit inside the first square I drew but still give me a fairly big seam allowance (because I’m hopeless!) and result in wipes that weren’t huge but still of a decent size.
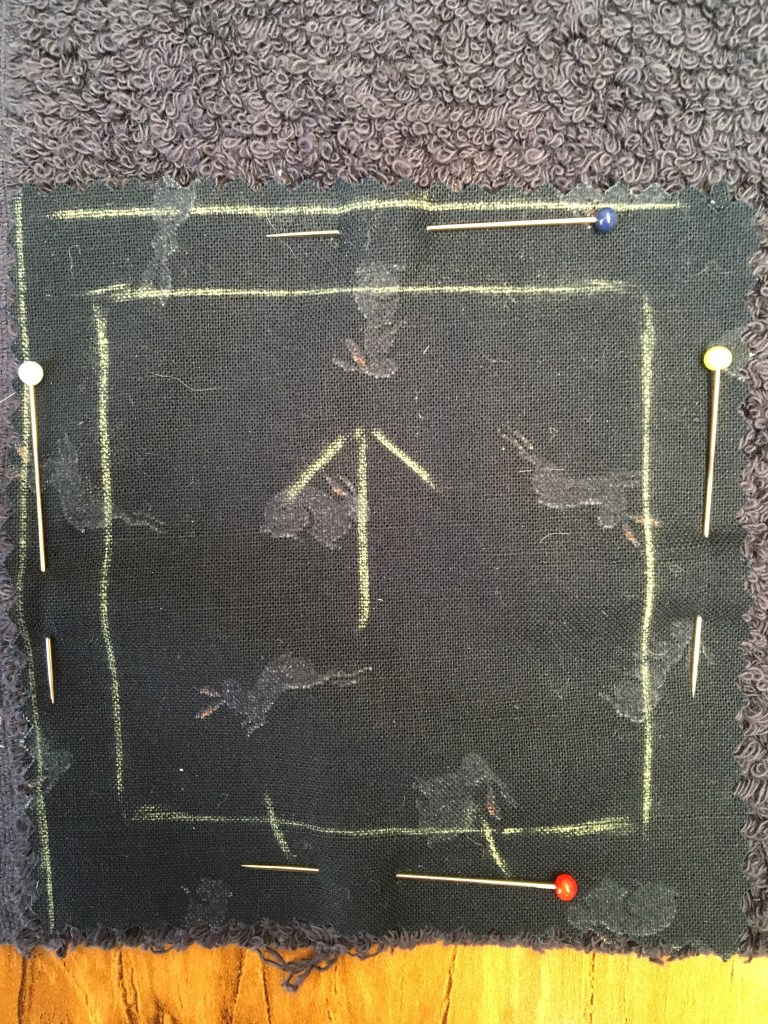
Step Four: Pin the pieces that will form one side of your wipes to the fabric that you are using for the other side. Make sure that the ‘right’ sides of your fabric are facing together.
Step Five: Cut around your first pieces of fabric, so that both pieces of fabric for each side of the wipes will be roughly the same size.
Tips: If you are using a fabric with a pattern on it you’ll need to decide which way ‘up’ you want the pattern to face. If both sides of your wipes are going to be patterned, you’ll want to make sure that the pattern goes in the same direction on both sides, so pin those pieces together accordingly.
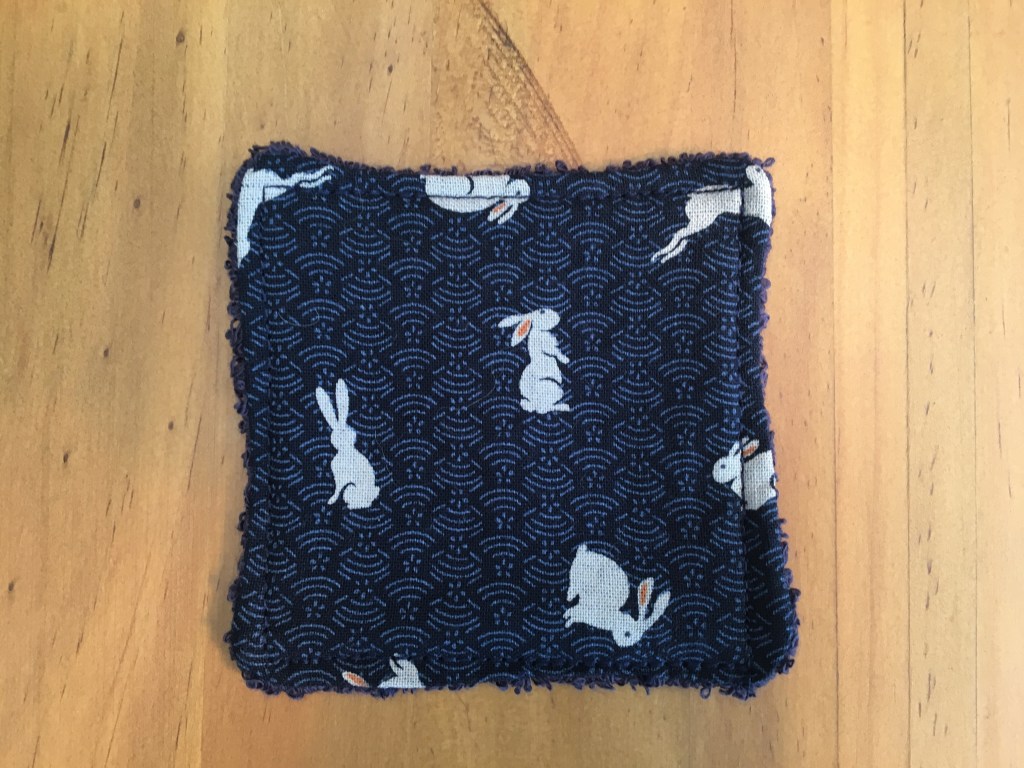
Consider the size of the pattern on your fabric. Is it going to be suitable for making small wipes? You can see that the hares/ rabbits on my fabric are spaced quite far apart. If this fabric did not also feature a wave pattern, I may not have used it for this project . Luckily, it seems that each wipe seems to end up with a few hares/ rabbits on display. A large, complicated pattern might not look right if you’re intending to give some of these away as gifts.
The Time of the Needle and Thread is Nigh
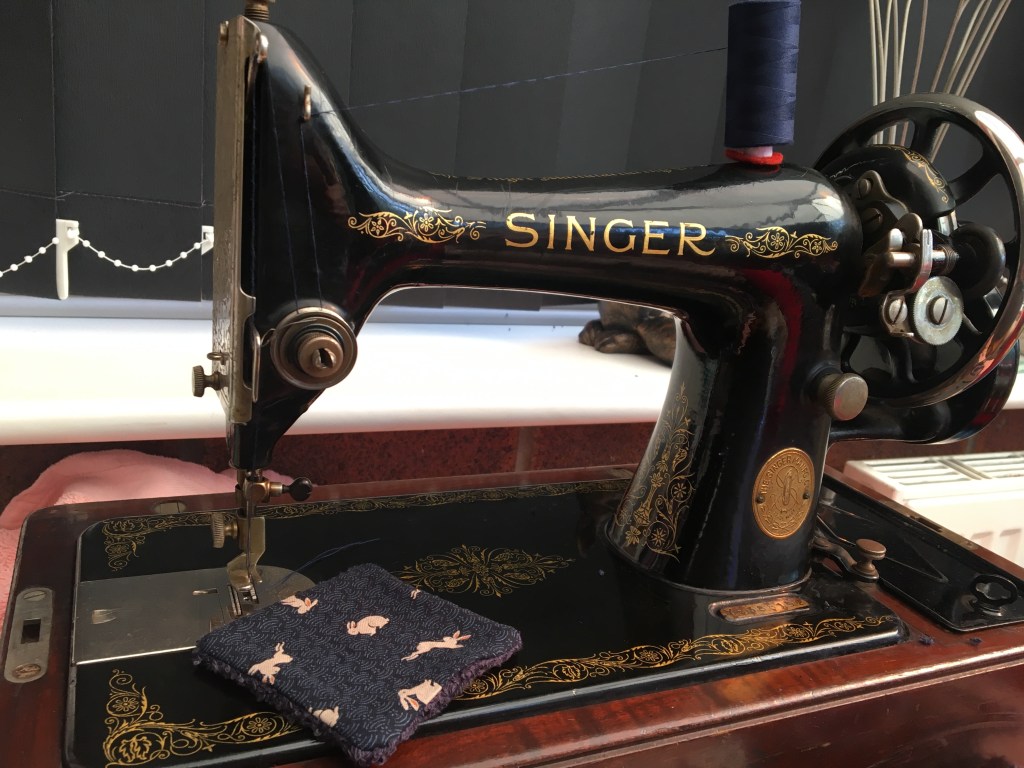
Now that you have cut all of your pieces out and assembled them all together, you’re going to start sewing them together. If you have a sewing machine, great! If you’re proficient with a sewing machine then you have probably already made the wipes by the time you have scrolled to this paragraph. I’m not great with modern sewing machines and, quite frankly, I’m slightly scared of them so when I do use a machine I use an old hand-crank sewing machine.
If you’re hand sewing I recommend that you use backstitch, which is more secure than a regular ‘in-out’ running stitch. You can find videos on how to do backstitch on YouTube. These will be much better than any explanation I can try to offer!
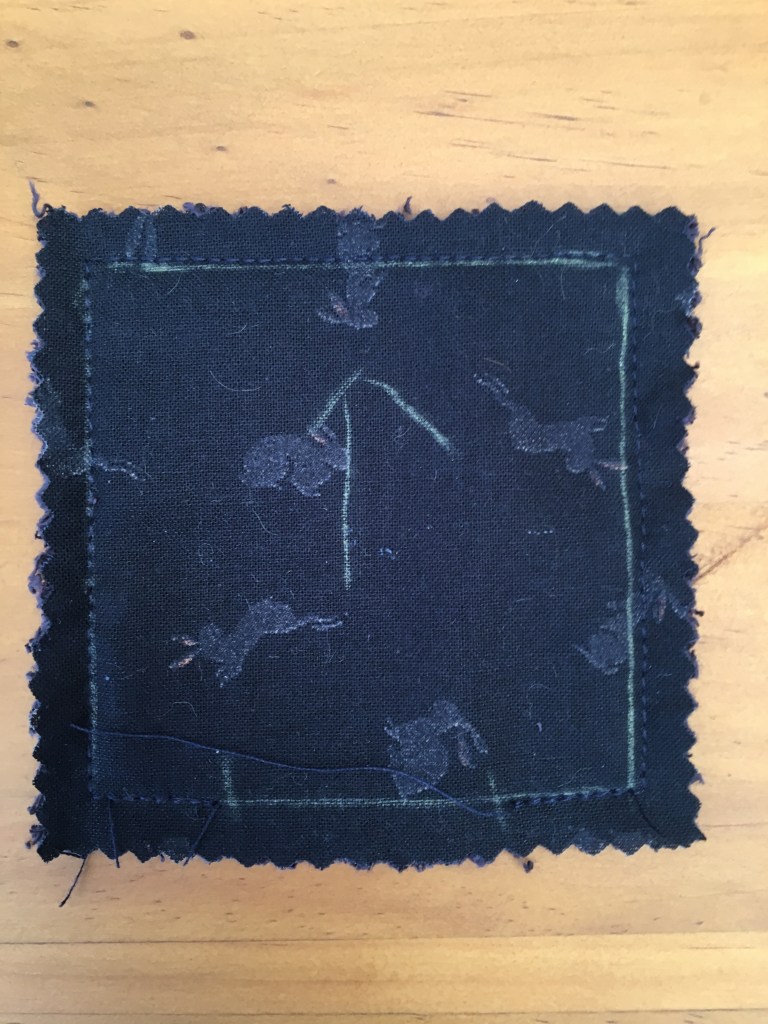
Step Six: You’ll want to sew on the outline you have drawn inside your shape. Sew around most of it but leave a small gap at the bottom so you can turn your wipes the right way round.
Step Seven: Once you have stitched around most of your square or whatever shape you’re using, you should snip any remaining threads, tie them off if you are hand sewing and turn your wipes the right way round. If you have given yourself quite a big seam allowance, you might want to trim the edges around your stitching down a bit with scissors or pinking shears before you turn them the right way round.
Step Eight: Your fabric might be a bit creased once you have turned it inside out, so iron it. The edges of the fabric where you left a hole to turn it inside out might peak out from inside your wipes, so tuck that inside and iron it down.
Step Nine: Now you’re going to sew up that gap up! If you’re using a sewing machine, you just need to stitch around the edges of your wipe, starting on the area where you left a gap in the seam and returning to go over it again once you have stitched all the way around. This gives a nice finish to your wipes but hand sewing the gap closed can also result in a nice finish!
If you’re hand sewing that gap shut, you’ll want to use an invisible ladder stitch. If you don’t know how to do this, you can find out how to do this simple stitch (it has to be simple or I wouldn’t be able to do it!) on YouTube.
Snip any remaining threads.

And you’re done! If you’re giving these away as gifts, you could pop them in a cotton drawstring bag or tie a piece of twine around them. If you’re going to put them in a little cotton drawstring bag and fancy having a go at another quick and easy craft project, you could decorate the bag by doing some Indian wooden block printing! You could also make a matching face cloth to go with your wipes; just use a large square or rectangular shaped object for your pattern!
You can find out more about Indian block printing and buy some excellent starter kits at The Arty Crafty Place. I bought my block printing kit from them. Their fairtrade wooden printing blocks are handmade in India by skilled craftsmen.

One thought on “Sew Easy! Making Reusable Makeup Wipes.”