
Spring Onions
In today’s post, Jason guides us through propagating spring onions, which you can do in the comfort of your own home, using supermarket bought cut-offs.
Spring onions, Green onions, Salad onions or Scallions are all one and the same!
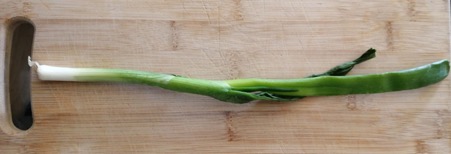
Now, most of us are familiar with this light onion-flavoured vegetable used as a garnish in soups, stews, salads and even omelettes – it’s so versatile yet so often, the most important part ends up in the bin – the bulb.
This is likely because spring onions are often bought in bundles and usually at a cheap price. But I suppose it has never been more important to know that these little heads can regenerate their green stalk with the right care. If you have a window space that receives sunlight, you might be able to extend your store-bought spring onions even further!
Now this can be done in any home.
All you need is:
– A few centimetres of the bulb of the spring onion with roots still attached.
– Small container
– Enough cold water to cover the roots and to slightly cover the base of the bulb
– Ideally a place where you receive sunlight, if not you can leave them out or even put them back into the fridge.
Once you place your spring onion into a container with cold water, put it in a sunlit area, fridge or an area where you won’t forget about them. Over a few days to a week, the roots should start growing and the green stalk should begin protruding through the centre of the spring onion upwards. Remember to change the water every couple of days or the water will begin to smell. This gives the spring onions a little extended life, roughly extending it to about two weeks. After that I would recommend planting them in a plant pot, otherwise they stop growing and begin to become quite mushy at the base.
Here is a time lapse video of the growth of a propagated spring onion.
Replanting
– A garden would be the most ideal choice but as not everyone has one, you can also pick up plant pots, big yogurt pot, half-cut water bottles – basically anything you can use as a container. Remember to add holes at the bottom for drainage.
– Soil/Compost
– A saucer underneath the pot for excess water
– A place that receives sunlight
Remove the bulb out of the container and
plant the head into a pot with soil and saucer,
leaving half a centimetre of the onion facing
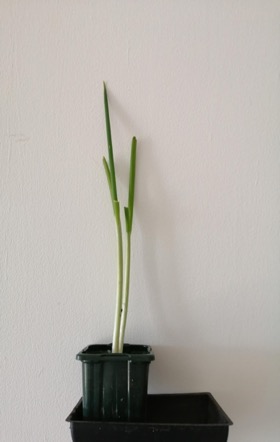
out of the soil. Move the plant to a sunny
location and remember to water every couple
of days.
Your spring onions might even bolt (begin to
flower) and produce seeds that you can plant or
dry out to plant another time.
In summary, you can plant your store-bought
spring onion heads and bring their green shoots
back out. In water, I’ve only used the green
shoots and not the white onion base.
One reason is because the onion base didn’t seem to grow in water, and secondly the base began to flake and turn brown after a couple of weeks. I would recommend planting them in soil, in sunlit spaces, where they survive much longer.
Feel free to share any tips you have for regrowing supermarket vegetables and how your spring onion’s regrowth went. There’s no better time to share tips to get the most out of our vegetables.
Also, did you know that spring onions are just young onions, that come from onions?!
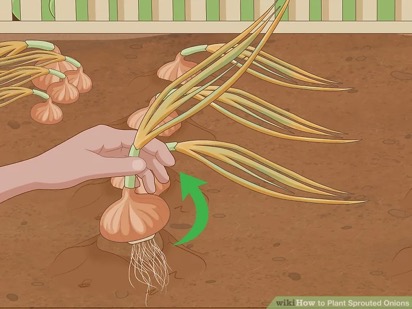
The shoots that protrude out of the top are the same shoots you see from spring onions. Individually, sections of the onion can be separated with the shoots to develop into spring onions.
There are even videos available online to show you how to turn bad onions to spring onions! It turns out there are lots of ways to be more sustainable with our food and this is one way to extend the life of those spring onions you buy.
Go on give it a go…it might save you a few trips out and bring a little more green into your home.
