
In this post, Debra shares her method of weaving on a cardboard loom.
Just a few days before the Whitworth closed in March, I had organised a short weaving workshop with my Visitor Team colleagues, using little pocket size cardboard looms. It was intended as a mindful and relaxing way to start the morning, as well as an opportunity to try out simple weaving. This idea was inspired by our recent exhibitions Tapestries, and Ancient Textiles from the Andes. I wanted to see how my own creative practice which involves weaving on a floor loom could be made much more accessible to anyone who has not tried weaving before. It was a very new method of weaving even for me so it was fun to experiment with this process. I continued to play around with this idea during the initial lockdown period using only materials I had to hand at home. I would like to share with you this method and hopefully it will inspire you to be creative and is suitable for all ages to try.
I tested out different sizes and I decided on a size that fit comfortably on my lap, but it can be made any size to suit.
What you need
Strong cardboard (3mm thick works well)
Scissors
Sticky tape
Double sided tape or glue
Pencil /pen
Ruler
Yarn to make the vertical warp (strong and non-stretchy yarn, such as cotton string or twine)
Yarn or material for weaving the horizontal weft – be experimental!
Useful to have
Large eyed needle – to weave with
Comb – to push down weft
Method
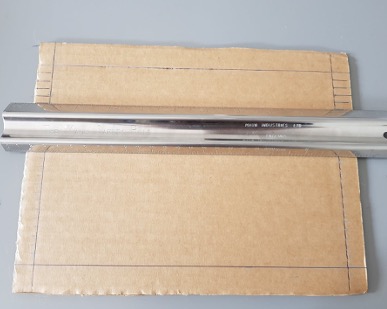
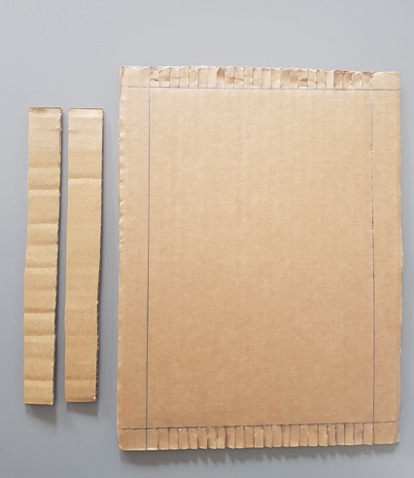
- Cut out a piece of cardboard to make your loom, mine measures 7 1/4 inches (width) x 10 inches (length).
- Cut out 2 x cardboard strips, I’ve made mine 3/4 inch x 7 1/4 inch (these are optional but helpful to create more room for weaving as they create a small gap between the loom and warp).
- Draw a line 1/2 inch at the top and bottom, then ¾ inch each side.
- Next you need to measure lines along the top and bottom 1/4 inch wide, for notches for the warp, which you repeat. Try to ensure they match up in a straight line; then cut carefully with scissors.
- Then stick down the cardboard strips with double sided tape or glue and place them underneath the notches top and bottom.

Making the Warp
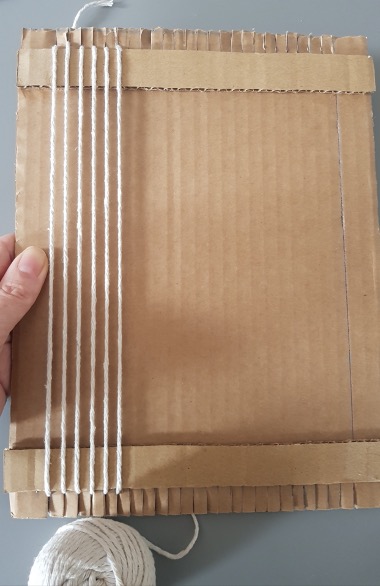
To make the Warp wind your yarn – starting from the back to the front – making sure to pull the yarn quite taught as you go. It’s important to choose something which is non-stretchy and quite strong, so string or twine is good to use. It’s helpful to leave a tail of at least 2 inches when you start at the back.
TIP: by adding the extra ¼ inch to the loom size allows you to have an even number of warp ends, which is beneficial when you come to tie the woven piece at the end. (Or just make sure you only wind an even number).
Front of loom
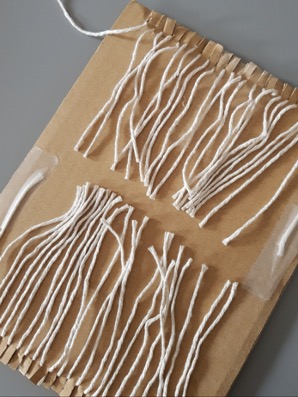
Then fix each of the ends securely to the back with tape.
Back of loom


It’s a good idea to start off weaving with string a few times to help stabalise things and assist with getting an even tension. I also finished off my piece this way at the end.
The simplest weave is called plain weave, which involves weaving under then over each warp end.
Then experiment with different yarns, tape, plastic, fabric, or even paper strips and ribbons. Be as neat or messy as you like. Enjoy the creative process rather than worrying about the result. It can be quite fiddly to weave the weft yarn through the warp so it can be helpful to use a needle with a large eye.

For my weave I have used strips of cotton tape that I had dyed using pomegranate and avocado skins. The colours reminded me of the Turner paintings in the Whitworth Collection, so I used them as inspiration. The image of Coniston Fells in particular was such a calming image to reference, during such a strange and uncertain time.

1801
D.1892.93
When you are ready to take your weave off the loom, snip the threads at the back of the loom across the middle, and carefully pull it away from the cardboard.
Then, lay flat and tie the warp ends together along the top and bottom; having an even number means you can tie two ends together in a small knot to make a fringe. Then trim the fringe to your preferred size.

How I finished for hanging.
The method I used is very, very simple. I used the first and last string along the top edge to make a hanger by tying them together. Then I inserted a piece of willow branch and tied this securely in place using each two ends of string across the top, before cutting away the excess above the knots. At this point neaten up any loose or messy stray ends by pushing them through to the back of the weave.

Happy Weaving!

https://www.whitworth.manchester.ac.uk/whats-on/exhibitions/pastexhibitions/tapestries/
https://www.whitworth.manchester.ac.uk/whats-on/exhibitions/pastexhibitions/ancienttextiles/
