

I remember buying so many tumblestones, little fossils and other small curios on trips to museums, other heritage venues and the odd crystal shop when I was a child. There was something magical at that age about being able to use your pocket money to buy a curiosity, a little piece of history and a memento of your trip to take home with you! They would take pride of place in my room for a while until, inevitably, my mum would get a bit tired of seeing them all spread out on my windowsill. And then they would be confined to a little ‘treasure pouch’ in a draw somewhere, taken out on occasion to be admired briefly before being stashed away again, or worse; they would be lost!
Why not keep the curios you (or you little ones!) collect safe and use them to create a personalised miniature museum case?
You will need:
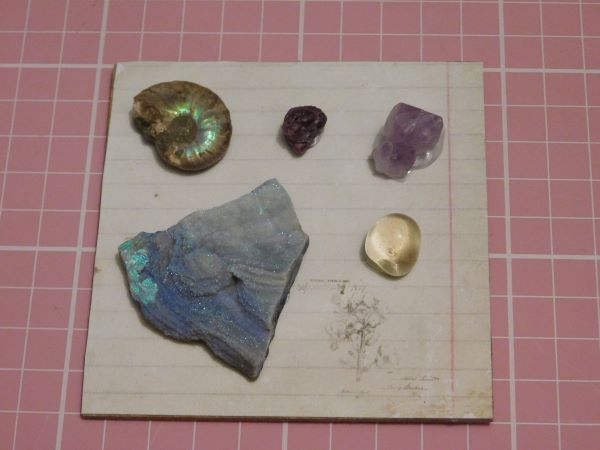
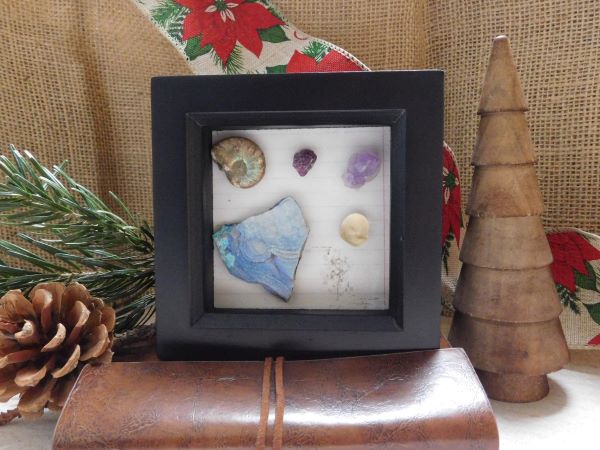
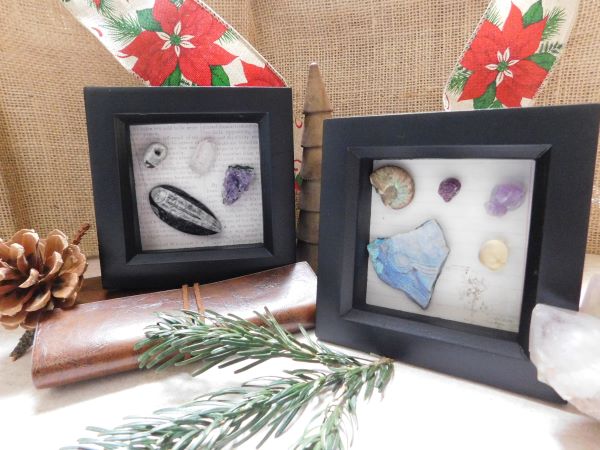
- You curios/ treasures- I used little tumblestones and a plastic animal figure small enough to fit inside a shadow box frame with the glass in place.
- A shadow box/ deep box frame in a size of your choice
- Cardstock for scrapbooking or any other card of your choice for the background
- Mod Podge and a little paintbrush to apply it with. You’re not going to see the Mod Podge, so it doesn’t matter whether you use the matte stuff or the glossy stuff. You should only need a small bottle. I used a 59ml bottle for a large case and two small ones and still have plenty left over!
- Scissors (to cut your card to size if it will not fit on the back board of your frame)
- Hot glue gun or a universal glue. I used Wilko’s own universal glue to secure crystals in two of the shadow boxes I was using.
- Pencil and/ or pen
- Any little embellishments you may wish to add, such as labels.

Step One:
Select your curios and treasures and decide which sort of card you want to use as the backdrop. This is also a good time to figure out the placement of the curios you wish to add to your little shadow box/ museum case!

If your card isn’t going to fit the back board of the frame as it is, you’ll want to trace around the board and cut the card down to size.
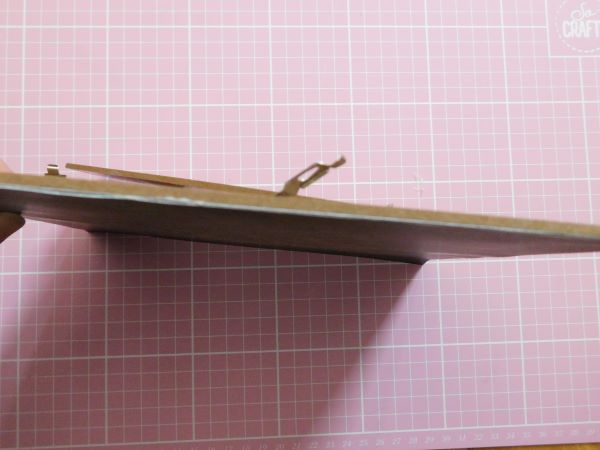
Make sure to check if your curios are going to fit inside the frame with the glass on. Shadow boxes tend to come with a removable aperture/ frame within the main frame in order to create a deeper space between the glass and the back of the frame. Try out the placement of your curios with the whole front of the frame placed over the back board of the frame and your card placed against the back board. This way you’ll be able to see if any details on your curios are obscured slightly.
Take a photo once you have worked out the placement, so you can remember how you wanted the completed case to look.

Step Two:
Apply a small amount of Mod Podge to the back board of the frame (not the side you will use to hang it up), using your paintbrush to smooth the adhesive out. Make sure you apply Mod Podge all around the edges and on the middle of the back board as well.
Step Three:
Apply your card to the backing of the frame. Make sure you have the card the right way up if the back of your frame has something to prop it up in a standing position or it has any attachments for hanging the frame up on the back.
Step Four:
Smooth the card down, especially around the edges, so that you can be sure it isn’t going to peel off.
Leave the backdrop you have just created to dry overnight.


Step Five:
The fun part!
If you’re only using a small shadow box frame or you don’t want to add any more layers of card, you can start attaching your curios to your backdrop once the Mod Podge has fully dried.
For the two smaller little curio/ museum cases I created, I simply applied a little bit of Wilko’s own universal glue to the back of the little fossils and crystals I wanted to display. The glue dries clear and creates a pretty secure seal, which works better than hot glue for heavier objects. It is rather permanent, though, so you may want to use hot glue if you’re a bit indecisive, want to change your décor frequently or if you want to be able to easily retrieve a piece in the event that a little one wants it removed from the case.

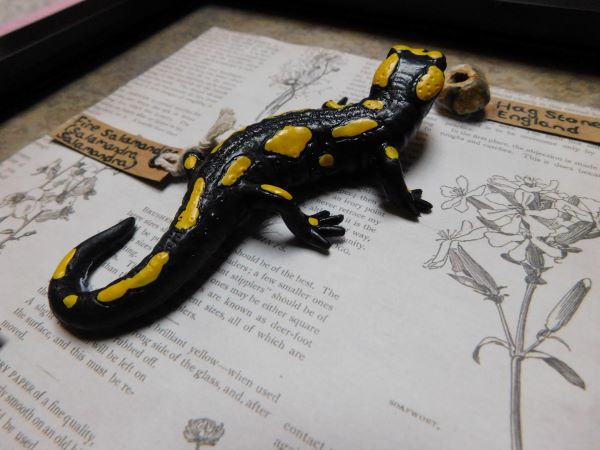
I used hot glue to attach the garnet tumblestone, hag stone and a salamander figure (for a bit of faux taxidermy!) and some artificial leaves to the backdrop of the larger shadow box frame. I used a glue dot on the back of each little piece of card/ label to attach the labels to my backdrop. Mod Podge was used to attach the smaller piece of card bearing a different design to the main backdrop. I used a pencil to draw small dots on the backdrop where the corners of the smaller piece of card were to be placed. This helped to act as a guide for the placement.


Step Six:
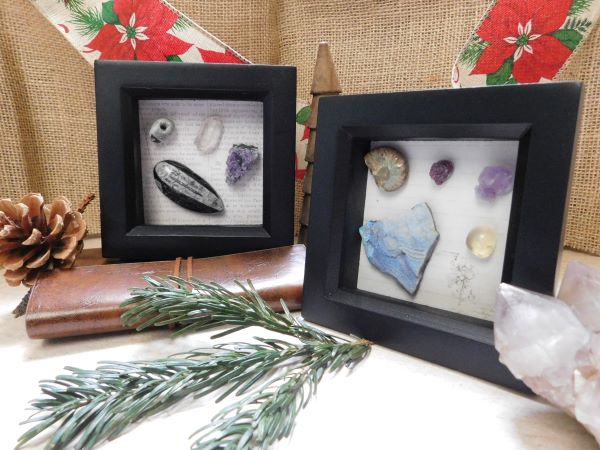
Clean up the glass of your frame before assembling the whole thing. I took pictures of my completed shadow boxes without the glass so you can see the details better without any pesky reflections.
Enjoy your curio/ museum case or wrap it with care for the recipient! – Steph
