
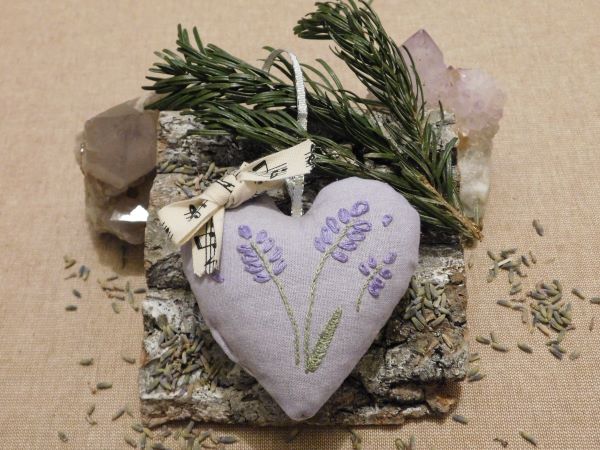
Learn how to embroider and sew lavender filled hearts for the home, inspired by a proof for ‘The Baby’s Opera’ created by Walter Crane.
When I was trying to think of cheap, easy to make gifts that could also double up as decorations for this online advent calendar, I came across something in our collections which gave me some inspiration. As someone who likes learning about old folk songs, I was delighted to discover that we have a hand-coloured proof containing part of a musical score and lyrics for Lavender’s Blue, one of my favourite folk songs, in our collection!

The Baby’s Opera was the result of a collaboration between artist and illustrator Walter Crane and the wood-engraver and colour printer Edmund Evans. Despite the reservations of the publisher regarding the potential success of the book due to there being no gold present on the cover, the book was a great success. It was so successful that the publishers looked to Crane to produce a sequel in time for Christmas but, as he was too busy, the job was then given to the illustrator Kate Greenway. The publishers were a bit naughty in their rush to get another best-seller on the shelves in time for Christmas; they did not ask Crane for his permission before publishing the book Greenway ended up producing with Evans as a companion to The Baby’s Opera. Do you think the publishers ended up with a lump of coal in their stockings?
The English folk song and nursery rhyme Lavender’s Blue dates back to a broadside ballad published before 1685. As is often the case with folk songs, many different versions have cropped up over time. Here’s the first verse of the version I’m most familiar with;
Lavender’s blue, dilly dilly, lavender’s green,
When I am king, dilly dilly, you shall be queen:
Who told you so, dilly dilly, who told you so?
‘Twas mine own heart, dilly dilly, that told me so.
With such sweet sounding lyrics, it’s no surprise to me that Lavender’s Blue was used Disney’s live-action adaptation of Cinderella in 2015. Was this the first time you or your little ones heard the song?
Considering the darker turn that some of the other versions of the song take, I think Cinderella was a nice introduction to a more light-hearted version of Lavender’s Blue for children.
The hand-coloured proof in our collection and the lyrics of the version of Lavender’s Blue I’m most familiar with gave me an idea for a gift that will keep things smelling fresh and add a rustic touch to the home.

To make lavender hearts of your own, you will need:
- Fabric- I used cotton fabrics in different colours
- Dried lavender flowers.
- Poly fill stuffing for toys (optional- this will help keep the heart keep its shape) *I used poly fill made from recycled plastic
- Thread for sewing
- Needle for sewing
- Scissors or crimping shears
- Ribbon- I’d recommend using a ribbon no more than 8mm in width if your lavender heart is going to be small
- Pins
- Pencil or pen
- A vanishing fabric marker, tailor’s pencil or tailor’s chalk (optional)
- Embroidery floss in purple and green (optional)
- Embroidery hoop (optional) * I used a 4 inch embroidery hoop
- Embroidery needle (optional)
The kind of lavender you use for your lavender heart depends upon your preference. Varieties referred to as ‘English lavender’ smell different from French lavender. If you’re out shopping in Manchester during the festive season, I’d recommend going along to King Street where the Soaps of Provence stall is usually situated when the Christmas markets are in town. They sell bags of lavender from Provence (which smells lovely) in addition to selling beautiful soaps and bottles of lavender oil.

Step One:
Draw a heart shape on a piece of card using your pen or pencil.
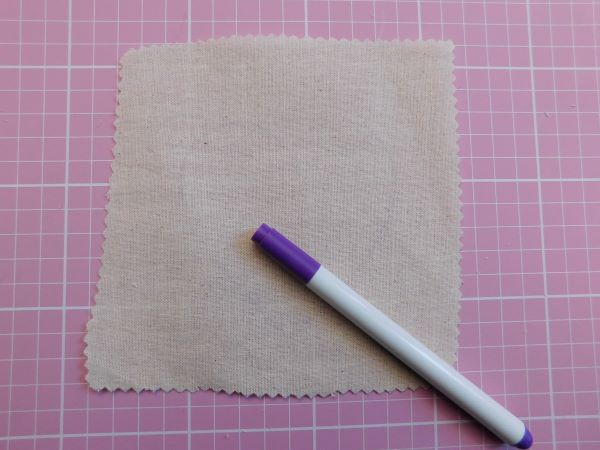
Cut out the heart shape and then draw around it on the ‘wrong’ side of the fabric you wish to embroider your lavender design onto. Cut a square of fabric, with the heart shape you have just drawn in the centre of the sqaure, from your length of fabric.
*The ‘right’ side of your fabric would be the side with a pattern in the case of patterened fabrics or, in the case of plain fabrics where the colour is mostly on one side, the side with the most colour.
The ‘wrong’ side would be the side without the pattern or the most colour. Some fabrics don’t really seem to have a ‘right’ or ‘wrong’ side, so you don’t need to worry too much about those.
OR
If you’re not going to do any embroidery, simply draw a heart shape on the wrong side of one of your pieces of fabric, then pin the fabric to your other piece of fabric with the ‘right’ sides facing each other. Cut around the heart shape, leaving a decent amount of space/ seam allowance. Skip ahead to step nine.

Step Two:
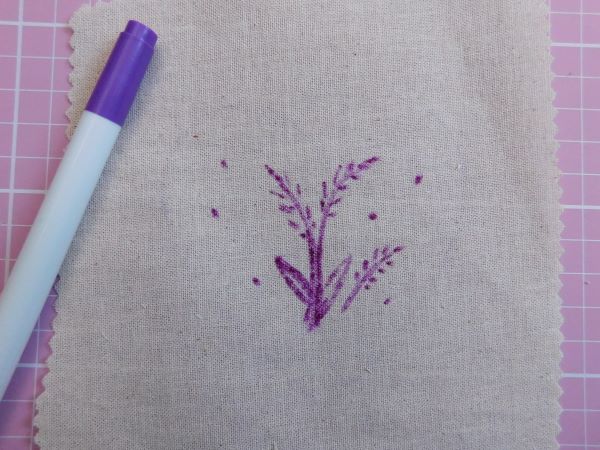
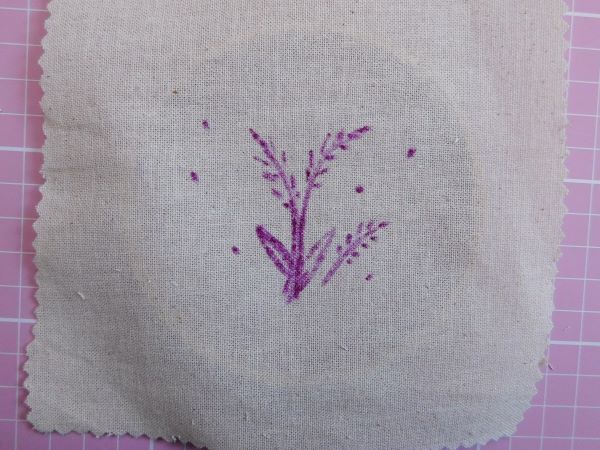
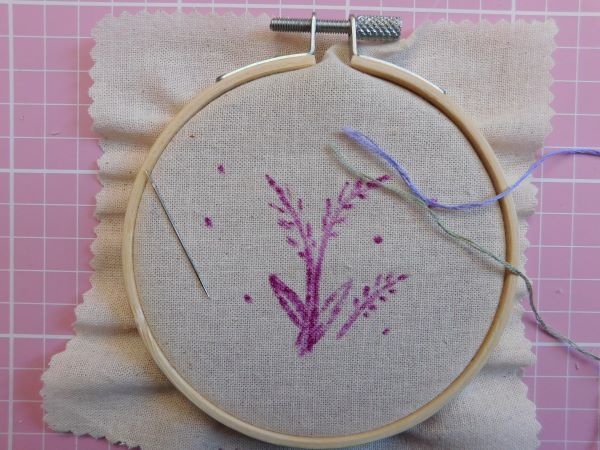
Once you have drawn a heart shape on the ‘wrong’ side of the fabric you are going to use for your embroidery, turn the fabric over and use a pencil, tailor’s pencil, some tailor’s chalk vanishing fabric marker to draw your design on to the ‘right side’. Be sure to keep your design within the lines of the heart shape you just drew on the ‘wrong’ side of the fabric.
Step Three:
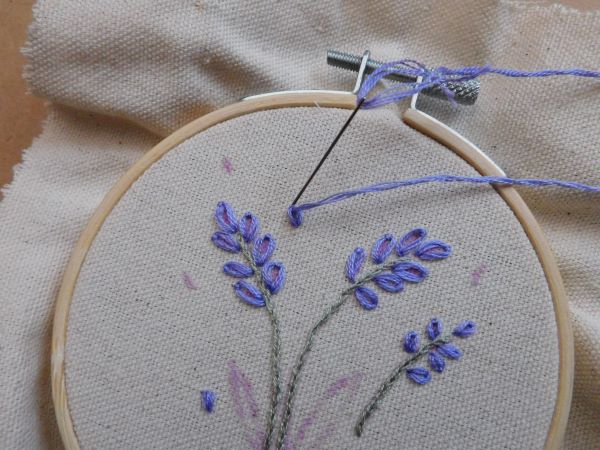
It’s time to place your fabric in the embroidery hoop. Place the fabric with your design on it over the inner ring of the embroidery hoop, then slot the outer ring in place over the fabric. Make sure your fabric is taught, a bit like a drum skin by pulling gently at the edges of your fabric and slowly tightening the screw at the top of the embroidery hoop.

Step Four:
Cut a small length of embroidery floss in your chosen colours and divide the strands to the thickness you want. I used three strands of embroidery floss for the stems of the lavender design I wanted to stitch. I used four strands of floss for the lavender flowers.
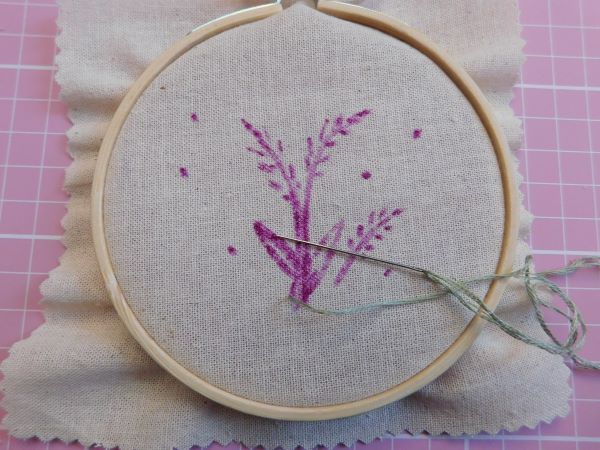
Step Five:
In order to create the stems of the lavender, I used split stitch. In order to create a split stitch, first insert your needle through the back of your fabric and do one normal stitch. Insert your needle into your fabric from the back again, this time bringing it up through the stitch you just created, and sew another stitch in the direction you want to go. Carry on like that and soon you’ll have a lovelylavender stem!
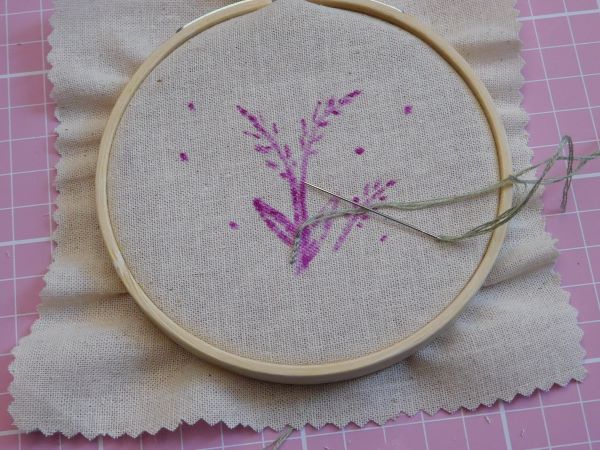

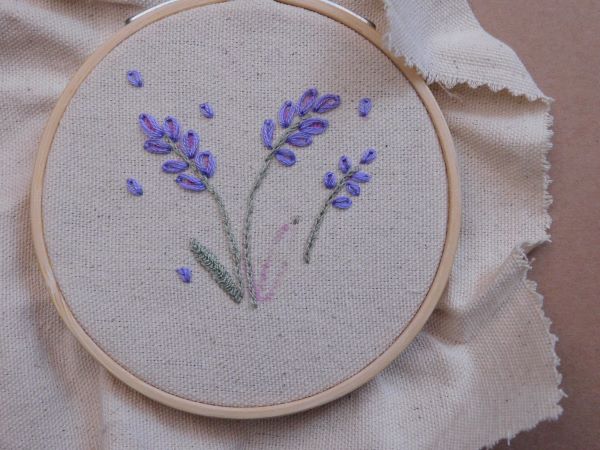
Step Six:
For the lavender flowers, I used a lazy daisy stitch.
To create a lazy daisy stitch, bring your needle up through the back of your fabric, then back down into your fabric next to where you first brought the needle in through the back. Do not pull the thread all the way through the fabric. Instead, make sure that you leave a small loop or ‘petal’ shape and then bring your needle back through your fabric close to the centre of the end of the loop or petal. Pull your thread through the fabric gently, being careful to not pull it too tightly in order to keep your loop shape. Then bring your working thread over the loop and take the needle back down into the fabric. This last part of the stitch secures the end of the loop or petal in place.
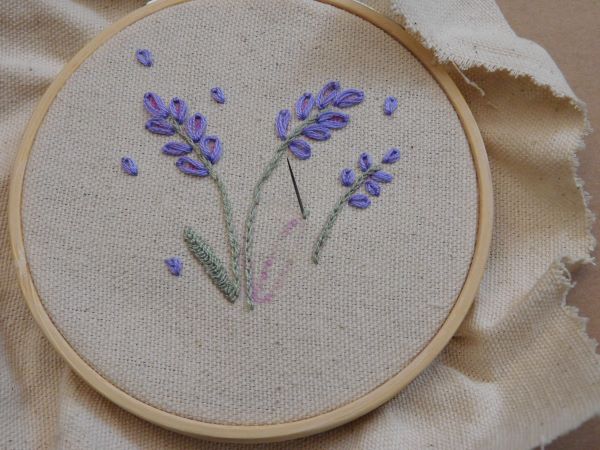
Step Seven:
I used fly stitch for the leaves on my lavender design.
Insert you needle into the back of your fabric at the top of your leaf outline. Stitch a normal stitch from the top centre of your leaf shape downwards. Bring your needle back through your fabric, close to where you began your first stitch, and then take your needle back into the fabric on the other side of your first stitch. Don’t pull the thread all the way through the fabric; leave a small loop to stitch over much like you did to finish off your lazy daisy stitches. This time your loop should end up as more of a ‘V’ shape once secured in place by the small central stitches you are making.
Carry on creating ‘V’ shapes going down your leaf. The central stitches will become the main ‘vein’ of the leaf- keep them nice and small. You can make the ‘V’ shapes bigger or smaller depending on where you are in stitching your leaf.


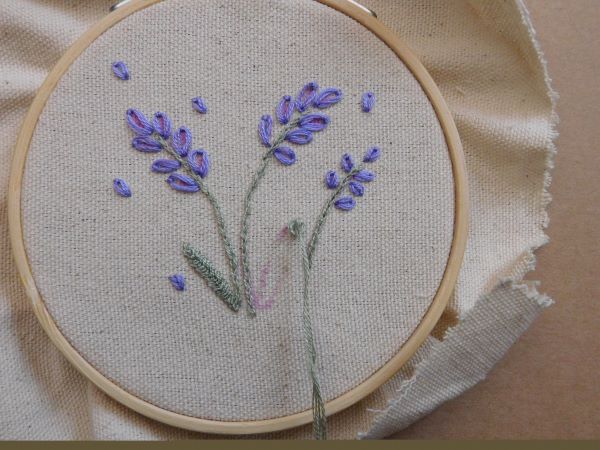


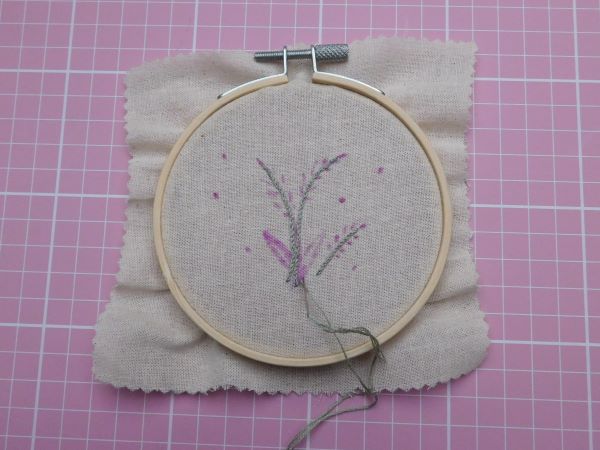
Step Eight:
Once you have finished your embroidery, remove your fabric from the embroidery hoop and start to cut around the heart shape you drew on the ‘wrong’ side of the fabric, making sure to give yourself a decent seam allowance.
Then pin the fabric with your embroidered design on it onto the fabric you will be using for the back of your lavender heart. Cut around the fabric bearing your embroidered design until you have two heart shapes

Step Nine
Once you have your two heart shapes, secure the ribbon you will use to create the loop your lavender heart will dangle from with a pin.

Begin stitching your lavender heart together using back stitch, making sure to leave a small gap in order to be able to turn your work inside out/ the right way round.
Back stitch works by first inserting the needle in through the back of your fabric, then coming up to do a normal stitch in the direction you want to stitch in. Then you bring the needle back through the fabric just a short distance away from your first stitch and the bring the needle back down into the fabric at the end of the previous stitch. From then on, you’ll continue to bring your needle up through the back of your fabric a short distance away from your previous stitch, before coming back down near the end of that previous stitch.
There are other ways to do a back stitch but I find it’s easier to make my stitches neat by following the ‘stab’ method I have just described.
Step Ten:
Trim your seam allowance slightly, making sure not to nick any of your stitches. This will make it easier to turn your work the right way around.
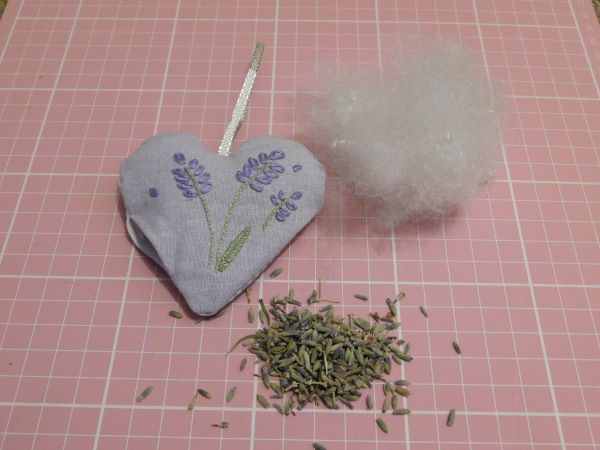
Once you have turned your work the right way around, you can begin to stuff it using a small amount of toy stuffing to help the lavender heart keep its shape and pack the heart with as many dried lavender flowers as you like!

Step Eleven:
Once you have stuffed your lavender heart to your heart’s content, sew the open seam closed using ladder stitch/ hidden stitch.
You can add other embelishments if you wish to. I made a bow for my lavender hearts using a ribbon that has a repeating pattern of musical notes, as a nod to Lavender’s Blue. I secured the bow in place using a few simple stitches.


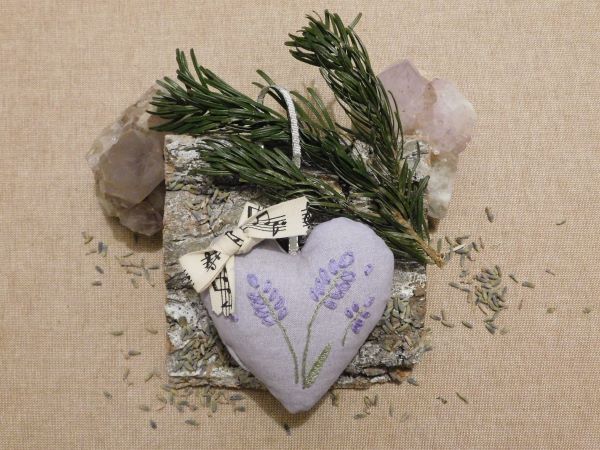
And now you’re finished. Hang your lavender heart wherever you please or wrap it with care to give to someone you love.
Whenever the lavender heart smells less fragrant, you can give it a squeeze and try to disturb some of the lavender flowers to help release more of that lovely, calming scent. – Steph
