
We don’t always have the time to make elaborate or large handmade gifts, especially during the busy festive season. Those of us who enjoy crafts can also take on far too much sometimes and end up with multiple unfinished projects that we can’t bring ourselves to resume for a while. Rather than put too much pressure on ourselves, sometimes the solution is to have a small, simple project that we can dip in and out of. Something that we can easily pick up at our leisure when we’re on the go or just relaxing at home but still finish in a reasonable amount of time.
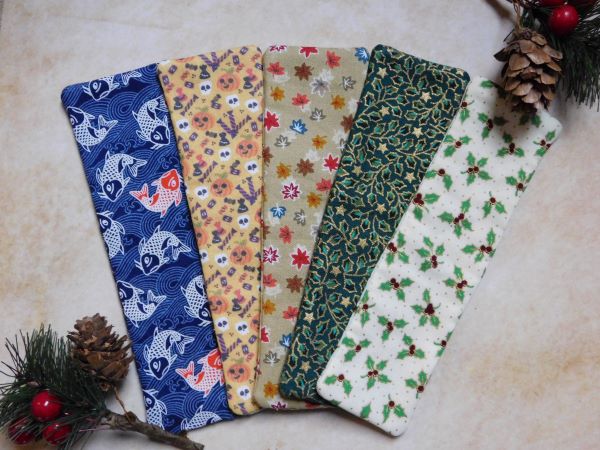
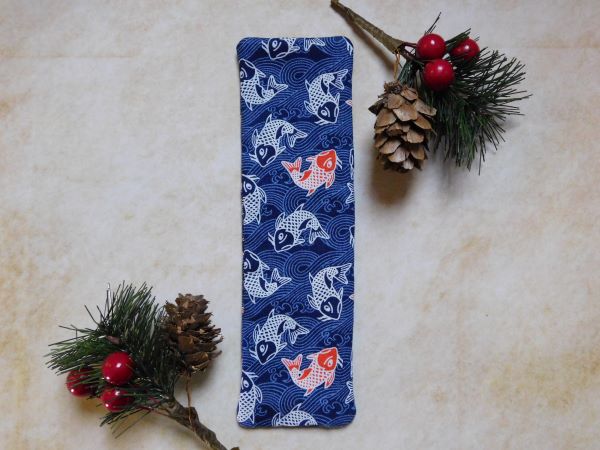
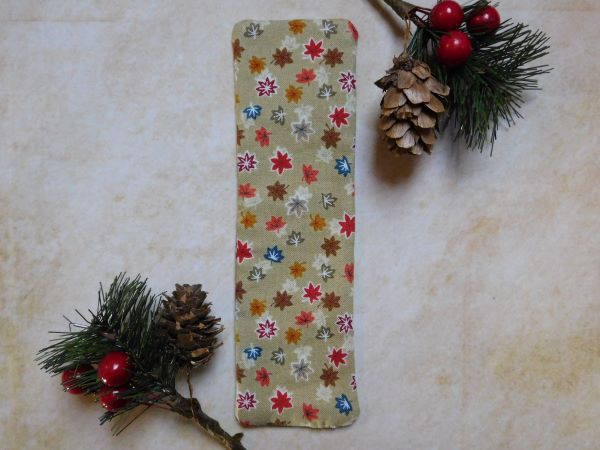
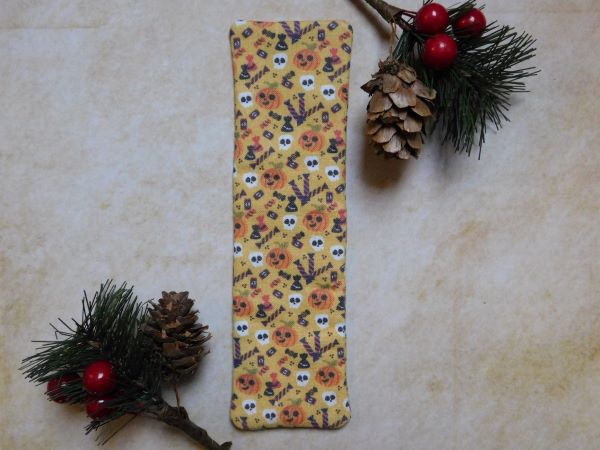
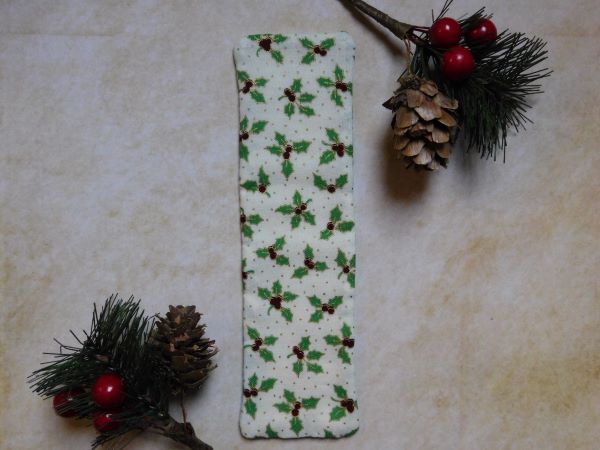
With that in mind, this year I decided to make some simple fabric bookmarks to give away as gifts. They’re great for popping in cards as a stand-alone gift or as nice little handmade addition to someone’s present. They’re also are a great gift idea for birthdays, Mother’s Day and Father’s Day too. I’m more of a Halloween fan than a Christmas fan so, naturally, I had to make a Halloween themed bookmark as well.
This project had the added advantage of helping me use up some of my fabric stash but not using so much of my favourite fabrics that I didn’t have enough left for another small project I had planned. It also works well if you only have some small scraps of fabric left or if you have an old garment which has seen much better days but you want to repurpose the fabric. If you don’t have a fabric stash, an old shirt or something else that you can use for fabric, don’t worry! A small amount of cotton fabric, such as a fat quarter or a half metre, will yield quite a few of these bookmarks.

If you plan on buying any printed fabrics just for this project, I’d recommend choosing fabrics which have patterns with a small repeat.
You will need:
- A needle
- Thread
- Pins
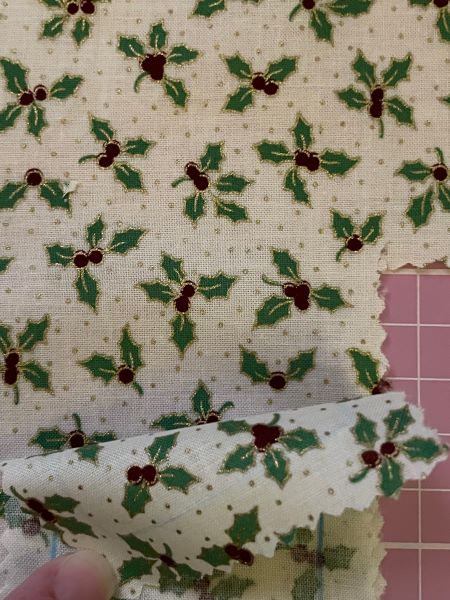
- A small amount of fabric. I used cotton fabrics.
- A small amount of cotton batting/ wadding or iron-on interfacing (optional)
- A pencil, tailor’s chalk or pencil.
- Scissors or pinking shears.
- The free downloadable pattern below or a pen, paper and a ruler to draw a small rectangle shape which you will use as your pattern.
You can download my free bookmark pattern as a pdf. here:
These bookmarks can be stitched by hand or on a sewing machine. I stitched mine by hand, so the instructions below reflect that.
Step One:
Cut your pattern piece out and draw around the rectangle pattern piece on the wrong side (back) of your fabric.
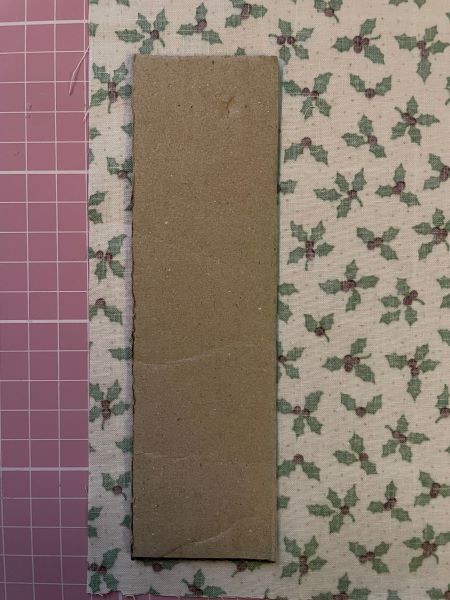
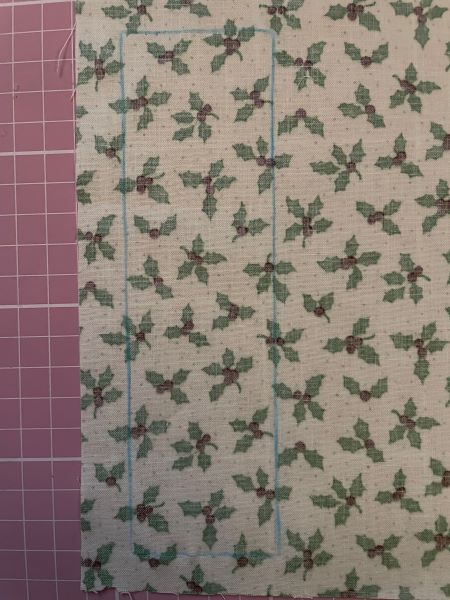
Step Two:
Cut around the rectangle you have just drawn, taking care to leave a small area of fabric around the rectangle to act as your seam allowance.
Step Three:
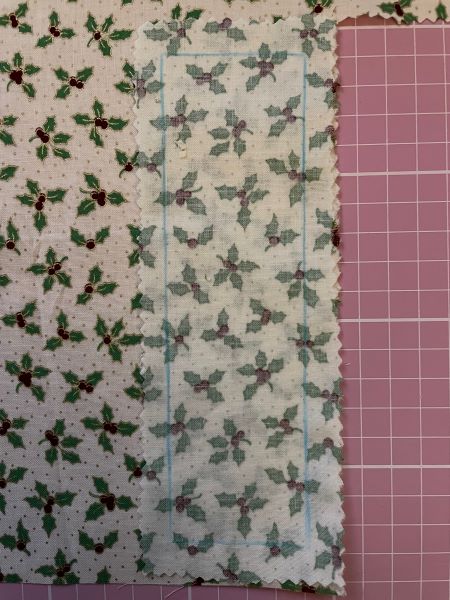
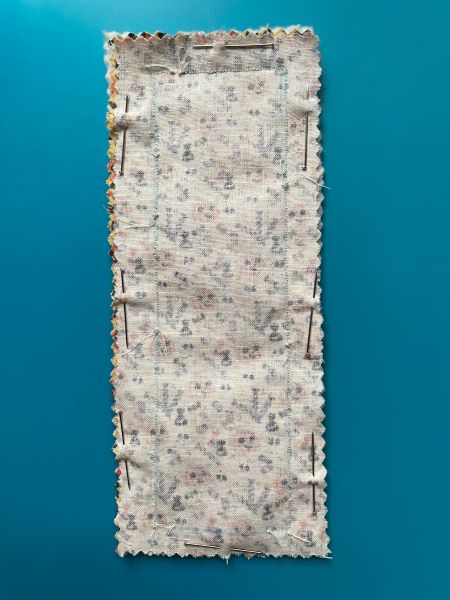
Pin the small piece of fabric you have just cut out face down to the right side (patterned/ printed side) of the larger piece of fabric you have just cut the rectangle from.
Step Four:
Cut around the smaller piece of fabric until you have two small rectangular pieces of fabric pinned with the right sides (the patterned/ printed sides) pinned together.
Step Five: *Optional
I like to use a bit of cotton batting/ wadding in my bookmarks to make them a bit more stiff and to use up the batting/ wadding I have. However, it is not absolutely necessary to use this so don’t worry about doing so if you have none. Please note that you do end up with a bit of a thicker bookmark if you use batting/ wadding. Alternatively, you could use some iron-on interfacing, which you would need to iron on the the ‘wrong’ side of one of your pieces of fabric.
Keeping your two rectangular pieces of fabric with the right sides together, pin them to your cotton batting/ wadding and cut around those until you have a piece of batting/ wadding the same shape and size as your rectangular pieces of fabric.
Make sure that the two pieces of fabric have the right sides facing together, with the piece of cotton batting/ wadding being pinned in place behind your pieces of fabric.
Step Six:
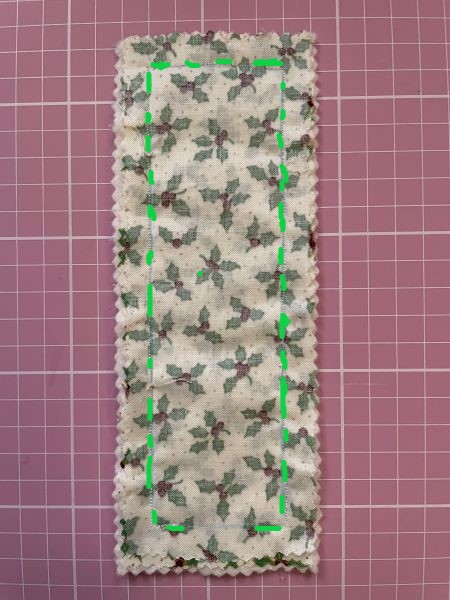
Using backstitch, sew your pieces of fabric (and the batting/ wadding if you have used any) together around the outline of the rectangle you drew on your first piece of fabric. Leave a small gap at one end of the rectangle so you can turn your work inside out once you have finished most of the stitching.
Step Seven:
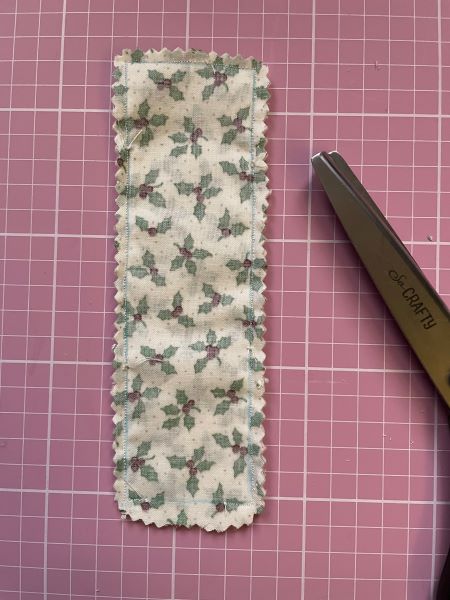
Trim down your seam allowance do not cut through the stitching using scissors or pinking shears.
Leave a bit more seam allowance at the bottom where you have left a gap for turning your work inside out/ the right way around.
Step Eight:
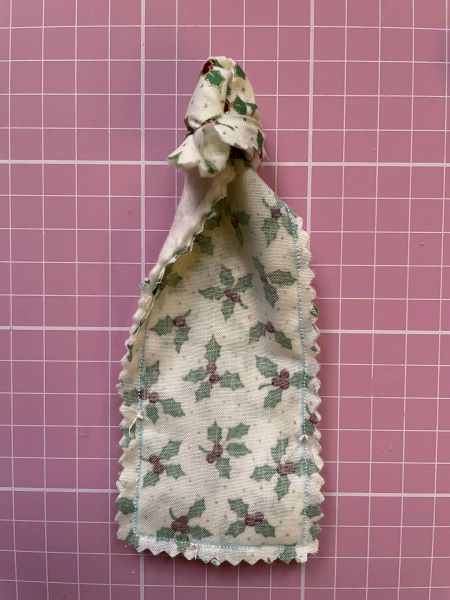
Turn your work inside out/ the right way around.
If you have any trouble with the corners, a chopstick or pencil can come in handy.
Step Nine:
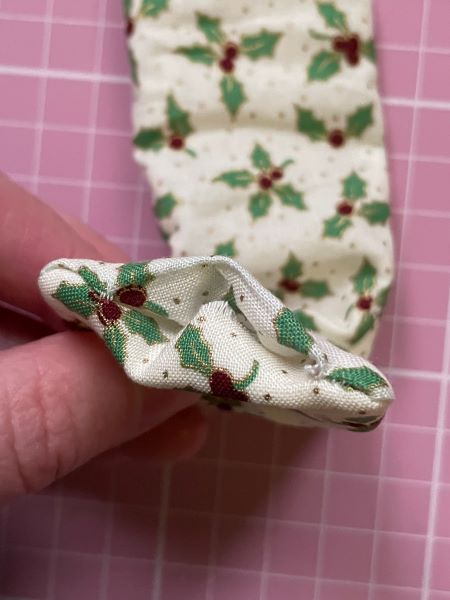
Fold the small amount of seam allowance you left at the bottom over so that it goes into the gap.
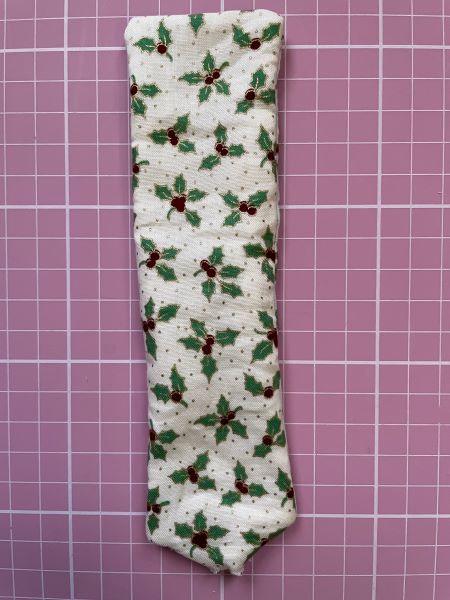
Now that your work has been turned the right way around, you’ll want to make sure it’s without creases before you stitch the gap at the bottom closed. Iron out any creases.
Step Ten:
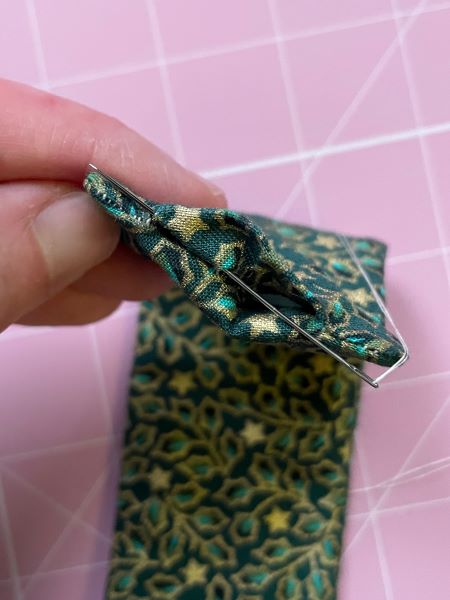
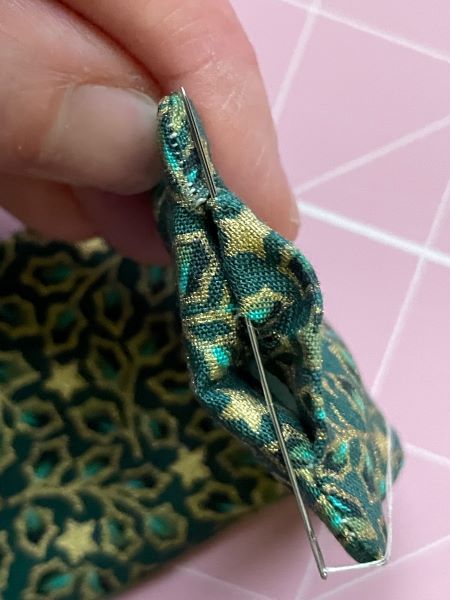
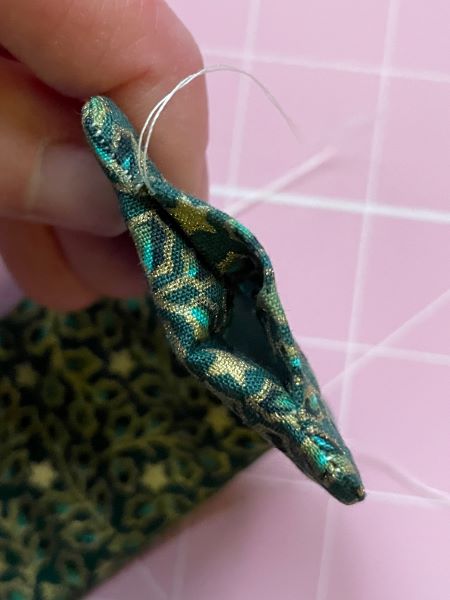
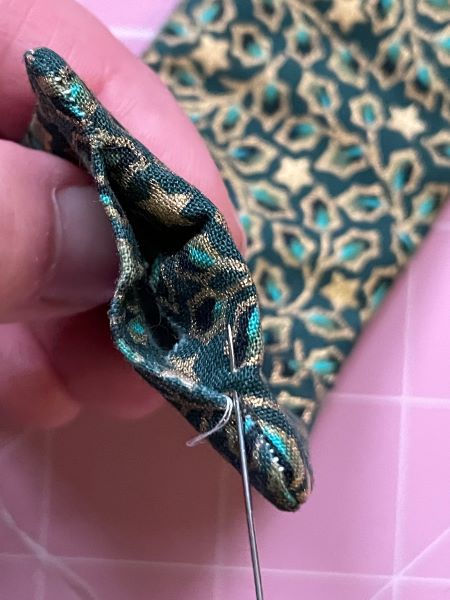
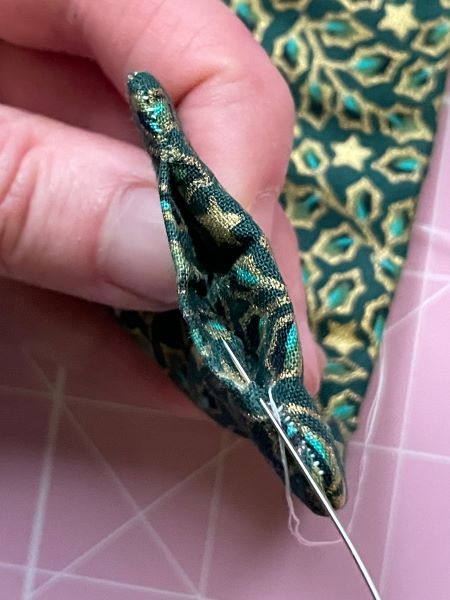
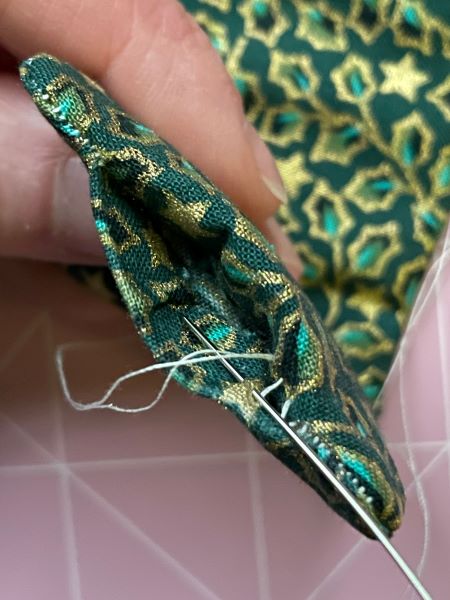
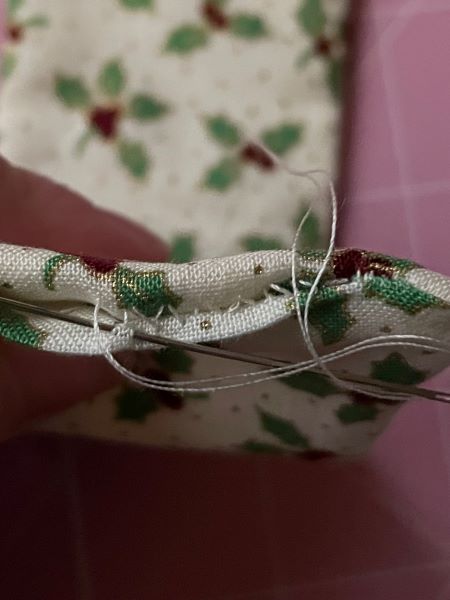
Making use of this small amount of seam allowance you left, stitch the gap closed using ladder/ hidden stitch. Make sure your stitches are in line with the other stitches either side of the gap.
Step Eleven:
Iron your finished bookmark so it is nice and neat.
Now you’re all finished!
I hope you have enjoyed making your own fabric bookmark. We’d love to see pictures of any bookmarks you have made using this pattern. Tag @whitworthart on Twitter and Instagram to show us your creations!
– Steph
